Mon - Sat, 7:30am - 7:30pm

Sales & Support- service@mechnician.com

Mercedes Sprinter Fault Code List of Common Fault Codes

Mercedes Sprinter Fault Code List of Common Fault Codes

To effectively troubleshoot issues in your Mercedes Sprinter, understanding the fault codes generated by its onboard diagnostics (OBD) system is crucial. In this comprehensive blog, we present a list of fault codes commonly encountered in Mercedes Sprinter vehicles. By decoding these codes and identifying potential causes, you'll be better equipped to address problems promptly and ensure optimal performance.

Mercedes Sprinter Fault Codes List 

Below is an list of fault codes that you may come across in your Mercedes Sprinter, along with their meanings and possible causes:
P0100 - Mass or Volume Air Flow Circuit Malfunction: Potential causes: Faulty mass air flow (MAF) sensor, air intake leaks, clogged air filter, or wiring issues. P0110 - Intake Air Temperature Circuit Malfunction: Potential causes: Faulty intake air temperature (IAT) sensor, wiring problems, or issues with the engine coolant temperature (ECT) sensor.
P0120 - Throttle/Pedal Position Sensor/Switch 'A' Circuit Malfunction: Potential causes: Faulty throttle position sensor (TPS), pedal position sensor, or wiring/connectivity problems.
P0130 - O2 Sensor Circuit Malfunction (Bank 1, Sensor 1): Potential causes: Faulty oxygen sensor, wiring issues, exhaust system leaks, or engine misfire. P0170 - Fuel Trim Malfunction (Bank 1): Potential causes: Fuel delivery problems, vacuum leaks, faulty oxygen sensor, or issues with the fuel pressure regulator. P0400 - Exhaust Gas Recirculation (EGR) Flow Malfunction: Potential causes: Blocked EGR passage, faulty EGR valve, wiring problems, or malfunctioning EGR control solenoid.
P0420 - Catalyst System Efficiency Below Threshold (Bank 1): Potential causes: Faulty catalytic converter, oxygen sensor malfunction, exhaust leaks, or engine misfire.
P0500 - Vehicle Speed Sensor Malfunction: Potential causes: Faulty speed sensor, damaged wiring, transmission issues, or problems with ABS wheel speed sensors.
P0562 - System Voltage Low: Potential causes: Weak battery, alternator failure, loose electrical connections, or faulty voltage regulator.
P0606 - PCM/ECM Processor Fault: Potential causes: Malfunctioning powertrain control module (PCM) or engine control module (ECM), wiring problems, or software issues.
P0700 - Transmission Control System Malfunction: Potential causes: Transmission-related issues, faulty transmission control module (TCM), wiring problems, or sensor failures.
P1187 - Rail Pressure Monitoring Control Variation: Potential causes: Low fuel pressure, faulty fuel pressure sensor, fuel delivery problems, or issues with the high-pressure fuel pump.
P2006 - Intake Manifold Runner Control Stuck Closed: Potential causes: Malfunctioning intake manifold runner control (IMRC) actuator, stuck closed flaps, wiring issues, or carbon buildup.
P2263 - Turbocharger Boost System Performance: Potential causes: Turbocharger-related problems, faulty wastegate, boost pressure sensor issues, or air intake restrictions. Please note that this list includes common fault codes but does not cover every possible code specific to different Mercedes Sprinter models and years. For accurate diagnosis and resolution, consult your vehicle's service manual or seek professional assistance when encountering unfamiliar fault codes.
Please note that this list includes common fault codes but does not cover every possible code specific to different Mercedes Sprinter models and years. For accurate diagnosis and resolution, consult your vehicle's service manual or seek professional assistance when encountering unfamiliar fault codes.

How to diagnose a Mercedes Sprinter without a fault code list

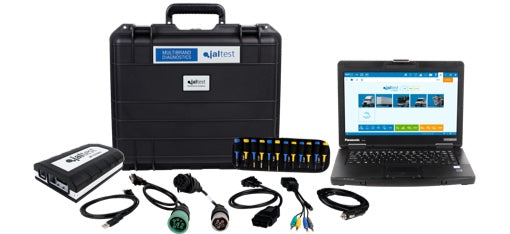
The complexity and variety of these codes make it impractical to list them all comprehensively.  However, using advanced diagnostic tools like the Jaltest diagnostic tool or other Mercedes Sprinter scan tools equipped with diagnostic software can greatly simplify the process of reading and troubleshooting fault codes.

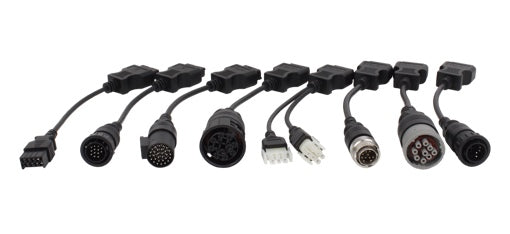
With tools like the Jaltest Light/Medium vehicle diagnostic tool, you can connect to your Mercedes Sprinter's OBD port and access a wide range of diagnostic functions. These tools have the capability to read fault codes directly from the vehicle's systems, providing detailed information about the specific issues detected. Additionally, they offer comprehensive diagnostic features, real-time data monitoring, and step-by-step guidance for troubleshooting and repairs.

By utilizing the power of diagnostic tools and software designed specifically for Mercedes Sprinter vehicles, you can streamline the fault code diagnosis process, save time, and ensure accurate troubleshooting. These tools are essential for both professional technicians and Mercedes Sprinter owners who want to take a hands-on approach to maintaining and resolving issues in their vehicles.

Remember, while fault codes provide valuable insights, it's important to exercise caution and seek professional assistance or consult the vehicle's service manual when encountering unfamiliar codes or complex issues. Regular maintenance, timely repairs, and the use of reliable diagnostic tools will contribute to the smooth operation and longevity of your Mercedes Sprinter.


Leave a comment

Please note, comments must be approved before they are published

This site is protected by hCaptcha and the hCaptcha Privacy Policy and Terms of Service apply.


Top 10 Toyota Tacoma Warning Lights You Shouldn’t Ignore

Top 10 Toyota Tacoma Warning Lights You Shouldn’t Ignore

Each Toyota Tacoma dash light has a story to tell and you can only ignore it at your own peril. Action on some of the lights that come on can be postponed for a while like low fuel which can wait till the next gas station comes along. Others like low oil pressure require immediate action and it is advisable to stop the vehicle and carry out servicing if the core engine is not to be affected.

In this post, we will go through the top 10 Toyota Tacoma dashboard lights that signal the state of your vehicle.

A Guide to Top 10 Toyota Tacoma Warning Lights

Toyota Tacoma dashboard lights give you a detailed update of the condition of your vehicle. They inform you in advance when the vehicle must be serviced and alerts you to any damage. Certain simple parameters that require action are also displayed on the dashboard. Hence, it is essential to decode the warning lights so that you will know how your Tacoma is operating and what you can do to continue maintaining its optimum performance.  

We will now go through the most critical Toyota Tacoma lights that warn you of any malfunction or deviation from set parameters.

  1. Malfunction Indicator Lamp 

This lamp looks like an engine and has the word CHECK underneath it. Though it indicates some issues with the engine systems, it does not specifically mention what the problem is. Check the engine light on the Toyota Tacoma and use the Jaltest diagnostic software to scan engine systems and know the cause of the malfunction. The other option is to book a dealer appointment and take your vehicle for servicing.   

  1. Maintenance Required 

This is an important part of the range of Toyota Tacoma warning lights and comes on to alert you that maintenance services are required. The symbol reads MAINT REQD, will light up for three seconds, and flash for 15 seconds before turning off. This cycle will carry on for 4500 miles and is a constant reminder that your vehicle is due for servicing.

  1. Low Oil Pressure 

Typically, Toyota Tacoma oil must be changed after every few thousand miles. If you go beyond certain limits a light will go on like the shape of an oil can. It is an indication that the oil pressure is running low and if you choose to put off this servicing, it might cause irreparable damage to the engine.  

  1. Tire Pressure Warning Light 

The tire pressure warning light will go on when the pressure monitoring system finds that the tire is below the recommended pressure. This Toyota Tacoma dashboard light looks like the side of a tire with an exclamation mark on it. The solution is to inflate the tire to switch off this light.

  1. 6, 7 Performance Indicators 

Apart from the Toyota Tacoma master warning light, there are multiple warning lights each linked to a specific performance. These will light up only when you are behind the wheel and driving.  

  • Four-wheel drive indicator that looks like a drivetrain system
  • Four-wheel drive low-speed position that reads 4LO
  • Downhill Assist Control system that’s a truck driving downhill
  1. Engine Temperature Warning Light 

Keep an eye on and check the engine light on Toyota Tacoma which indicates that the engine temperature is rising and high. It shows that the engine temperature is very high and the engine needs to cool down. It is not only continuous driving or high outside temperatures that might trigger this warning, some of the other reasons are mechanical issues, low coolant levels, and lack of oil. If this happens, stop and have your vehicle towed to a local service station.

  1. Battery Warning Light 

This is among the key Toyota Tacoma warning lights and tells you that the battery needs attention. It is very critical as not only do you require a charged battery to start the vehicle but also to turn on the headlights and side lights. This light popping up means that the alternator is no longer charging the battery and it is running on the power stored in it and will soon run low. The option here is to replace the battery yourself and get the alternator working again.  

  1. ABS Warning Light

There may be several issues if the ABS or anti-lock warning light goes on. Among the main ones are low fluid levels, ABS system is turned off, malfunctioning ABS module, broken wheel sensors, and more. It is not easy to diagnose the main cause and hence, use our Toyota Tacoma diagnostic software or take your vehicle to the nearest service station to get to the root of the problem.  

The Toyota Tacoma warning lights on the dashboard are more important than you think. Hence, ensure that you are thoroughly familiar with them and know what to do if one of them lights up.        

Ford Transit AWD System Troubleshooting: How to Keep Your All-Wheel Drive Running Smoothly

Ford Transit AWD System Troubleshooting: How to Keep Your All-Wheel Drive Running Smoothly

Ford has added two variants to its commercial vehicle family – the Trail and Active variants on both its Transit (2-ton) and Transit Custom lineups. These models individually have different purposes on two ends of the spectrum. One is designed to negotiate challenging terrain, offroad or at construction sites and the other is to cater to “active” lifestyles. In both cases, it is necessary to get a grip over Ford Transit AWS system fault codes to ensure that your vehicle is always in peak working condition.

Before going into the nitty-gritty of the Ford diagnostic software, it is necessary to have a basic understanding of the Ford Transit mLSD AWD system. The vehicle is built to have extra traction on slippery and soft ground surfaces giving you the confidence to drive on off-road tracks. This is possible because the mLSD automatically moves the engine torque in slippery conditions to the wheel that has the most traction allowing the Transit to move smoothly over the challenge ahead.

A part of the Ford diagnostic trouble codes tracking list is the Electronic Stability Control system that has been recalibrated to align with the mLSD. It is a system that enhances the handling characteristics of the Ford Transit without having any effect on fuel efficiency or CO2 emissions. No additional driver inputs are required for more traction as the vehicle senses and pulls up the acceleration accordingly.

The Jaltest Diagnostic Scan Tool For The Ford Transit AWS System 

When the warning lights go off on the dashboard of your Ford Transit AWS vehicle, take it as a cry of distress from the internal systems of the vehicle. Fortunately, modern vehicles including the Ford Transit have the On-Board Diagnostics 2 (OBD 2) system that can inform you about any issues in the form of Ford transit warning lights on the dash.

Once you know how to read the OBD 2 codes, you get insights into the vehicle’s health and can take preventive action before they become major issues leading to a stall. With our Ford scanner tool you can either go through full system scan to know whether all metrics are performing satisfactorily or undertake scans by symptoms so that specific problems are addressed.

We will now go into the main diagnostic portion of the Ford Transit vehicle and get more insights into the functioning of the OBD 2 system codes.


Understanding the Ford Fault Code List 

The Ford Transit AWS system service recommendations is designed to keep your vehicle on the road regardless of the battering it might go through in difficult terrains. The OBD 2 system is a standard part of all vehicles manufactured in the USA after 1996. The main purpose of the system is to track the performance of several parameters of the vehicle including emission, engine, transmissions, overheating, and more. All this information is continually gathered by sensors and informed to you through Ford Transit warning lights. 

Our Ford fault code scanner can read the secret language used by the vehicle to communicate with you about any problems. When the vehicle faces any issue in its systems, a code is generated by the OBD 2 that refers to a specific issue or malfunction. These codes are valuable clues that help to diagnose and troubleshoot any problems. It prevents guesswork on your part about what is wrong so that precise remedies can be worked out.

Reading the OBD 2 Codes of the Ford transit AWD system 

You will find the OBD 2 port located either beneath the dash on the driver’s side or near the center console. It has a unique shape with two rows of pins and is easy to identify. You can refer to the Manual to know about its precise position.

Here are the steps to read the OBD 2 codes and how to interpret them.

Step 1: Use a Ford Diagnostic Tool 

To retrieve the OBD 2 codes, you will need a code reader or diagnostic and troubleshooting tool. The Jaltest Ford diagnostic scanner will come in very handy here. It can read all fault codes ranging from engines to transmissions to body computers and take preventive or rectification measures that are no less than dealer-level servicing.  

Step 2: Connect the scanner to the Jaltest Ford Fault Code List   

Insert the connector of the Ford diagnostic software into the OBD 2 port of the Transit. Keep the ignition in the “on” position but the engine should not be running.

Step 3: Read the codes 

Our Ford fault code list provides instructions on how to read the codes. The scanner displays a list of alphanumeric characters with each representing specific issues in the Ford Transit AWS system.


How To Interpret the OBD 2 Codes 

After retrieving the OBD 2 codes, you should now decode them. This is what the cutting-edge Jaltest Ford diagnostic trouble codes list is optimized to do. The code consists of five characters with the first being an alphabet and the remaining numbers.

This is how the diagnostic scanner tool decodes the fault list.

  • The first character is an alphabet that denotes the system or the area where the fault is located. For example, “C” denotes problems with the chassis, “P” for powertrain, “U” for network communication, and “B” for body.
  • The second character onwards is numbers. The first number is a 1 or 0. The number 1 means that the problem is specific to the manufacturer while 0 denotes that the issue is generic.
  • The third, fourth, and fifth numbers progressively provide information about the problem within the system.

To read the codes correctly and take service-level action, you will need a troubleshooting tool like our Ford diagnostic scanner. 

Common Fault Codes for Ford Transit AWS System

Now that you know how to read the OBD 2 codes, here are some examples to help you understand the concept better.

  • P0300 - Random/Multiple Cylinder Misfire Detected:

This code pops up when there are multiple engine cylinders that are misfiring. Physically, you will feel the engine shaking and producing less power. This fault code is typically due to faulty ignition coils, spark plugs, or fuel delivery issues.  

Possible causes include faulty spark plugs, ignition coils, or fuel delivery issues.

  • P0171 - System Too Lean (Bank 1):

This code is an indication that the air-to-fuel ratio in the engine is low, that is, there is too much air and too little fuel. Probable causes might be faulty fuel injectors, dirty mass airflow sensors, or vacuum leaks. With this issue, you must carry out a Ford Transit engine fault service now.

  • P0420 - Catalyst System Efficiency Below Threshold (Bank 1): 

This code is an indicator that there are issues with the catalytic converter that might not be efficiently processing the exhaust gasses. Some of the recommended fixes include either replacing the catalytic converter or verifying whether there are leaks in the exhaust.

Another important error code that might crop up in our Ford fault code scanner is excess soot buildup in the diesel particulate filter. This prevents the vehicle from running in top performance mode and it might even go into limp mode. To prevent this possibility, we perform force regens and measure the pressure and the temperature of the exhaust gasses.


Stagewise Troubleshooting For The Ford Transit AWS System 

How do you use our Ford diagnostic software to get the best performance from your Ford Transit? Here is a step-by-step process for using our troubleshooting tool.

  • Connect the Jaltest tool to the OBD port and read the fault code that is displayed on the diagnostic software.  
  • Depending on the fault code, take dealer-level service if required. Check the related components for visible signs of wear and tear. Our software even offers guidance on component replacement procedures.
  • If you are going by system scans based on symptoms, you might need to use specific tools like a compression tester or a multi-meter to diagnose systems.
  • In case your diagnosis shows faulty parts and components either replace or repair them.
  • After the issues have been resolved, use our scanner to clear the Ford diagnostic fault codes.To be sure about the vehicle, take it for a test drive to confirm that all issues have been resolved.

Summing Up

Many items in the Ford fault code list can be avoided through preventive maintenance. Ensure regular servicing and maintenance as advised by the vehicle manufacturer to avoid issues that lead to fault codes and thereby potentially costly repairs.

In most cases, preventive maintenance does not mean going through elaborate procedures. Regular oil changes, checking and replacing worn or dirty spark plugs, and air and fuel filter replacement are all that need to be done.    

Top 5 Common Sany Excavator Problems and How to Fix Them

Top 5 Common Sany Excavator Problems and How to Fix Them

When you are investing in construction and material handling equipment, selecting the right manufacturer can make a world of difference to your return on capital. Top-quality equipment like Sany will increase your operating efficiency, reduce costs, and streamline the effectiveness of your ongoing projects. However, as in all MHE, problems are bound to crop up and Sany is no exception. 

Fortunately, Sany excavator problems can be overcome when you use the Jaltest cutting-edge Sany diagnostic software and maintenance tool. From hydraulics to track tension, from forced regens to transmission, our software ensures that your Sany equipment is always in peak performance mode. 

This post will focus on the top 5 excavator problems faced by owners of Sany excavators and how you can get around them, sometimes with a little nudge from our Sany diagnostic tool. 

While going into some key problems that might crop up with your Sany excavator and how to resolve them, a quick word on excavators, in general, will be in order. 

A Rundown of Sany Excavators

Excavators are among the most common and versatile equipment on any excavation or construction site. Mini excavators additionally have the benefit of having a small footprint and due to their compact swing, can get into small cramped spaces that are beyond the reach of larger machines. Sany manufactures a range of excavators, from small, medium, and large ones. They are perfect for small projects like residential landscaping or large ones like factory building or other massive construction needs. 

Like all heavy equipment, Sany excavators need to be maintained properly to get the best out of them and ensure that downtime is a rarity. Critical to it is a well-designed preventive maintenance strategy with the Jaltest Sany excavator troubleshooting tool that will keep your equipment operating safely and effectively. The reason why preventive maintenance is so vital is that it helps you handle any minor issues before they become full-blown problems and put your excavator off the job.

When it comes to any issues with the engines in Sany excavators, the Sany excavator fault codes in our software clear them to get the excavator working again. This is regardless of the engines used in the Sany excavator. Typically, Sany uses the Yanmar engine in their mini excavators, Isuzu in mid-sized excavators, and Cummings in large-scale equipment. Whatever Sany excavator you choose, you will get an engine from a respected manufacturer, one that the Jaltest diagnostic software is designed to handle optimally.
5 Typical Sany Excavator Problems And How To Get Around Them

If you have a fleet of Sany excavators working around the clock, maintenance and faults are bound to crop up. You need troubleshooting software to diagnose them and get dealer-level service at the site itself.

So, let us go through the 5 common Sany excavator maintenance issues and how to resolve them. 

  • Over or Under Lubricated Moving Parts
  • Excavators are complex machines with several moving parts that need to be well-lubricated to perform efficiently. The main ones are as follows.  

    • The undercarriage pins and bushings need to be greased regularly with one to three shots of grease.  
    • The slew bearing that helps the cabin to rotate on its chassis should be greased as given in the manual, usually every 50 hours of operation. 
    • Track rollers and idlers, a critical part of the undercarriage of your excavator should be greased once per week or as per the frequency recommended in the manual.
    • Bucket linkages are parts that connect the bucket of the excavator to the boom arm and should be greased daily.  

    However, you might face problems if you over-grease or under-grease these moving parts. Go through the manual that has detailed diagrams of the various greasing points of your excavator and how much grease should be applied. 

    Under-greasing

    If moving parts of an excavator are not properly greased, it leads to increased friction, consequential breakdown, and increased wear and tear. When this happens, component breakdown can lead to costly repairs. Check the component replacement guide in the Jaltest Sany excavator troubleshooting software.  

    Over greasing  

    Over-greasing has its own set of troubles. It attracts dirt and debris to the greasing point and damages the seals. This leads to needless wear and tear on vital components and results in premature failure. 

  •  Improper track tension
  • Among the probable Sany excavator problems is improper track tension. Excavator tracks are one of the critical components of the machine and maintaining them in peak condition should be high on your list of priorities. It is the tracks that help an excavator maneuver nimbly over challenging and uneven terrain and hence, maintaining the correct tension keeps the excavator safe and easy to operate. 

    Regardless of whether it is Sany SY35U problems or of any other Sany model, improper track tension gives rise to a host of maintenance-related issues. Tracks that are very tight put excessive pressure on sprockets, rollers, and idlers, thereby reducing their life cycle. On the other hand, loose tracks can cause the undercarriage to sag and this puts added pressure on the pins and bushings. 

    To get around this problem, use the Jaltest diagnostic software to adjust the track tension as per the manufacturer’s specifications. It is advisable to check the tension of the tracks before every shift is started. You can also visually check whether the track tension is right or not. Tracks that are stretched taut between rollers and the excavator have difficulties moving because they are too tight. Tracks that sag between rollers are too loose. 

  • Final Drive Motor and Engine Problems and Failures
  • Final drive motor problems

    The final drive motor transfers power from the hydraulic motor of the excavator to the tracks. It is responsible for the performance of the machine by increasing torque and carrying out jobs that require a lot of power like digging, trenching, or excavation. You will know that there are Sany excavator problems with the final drive motor when there is reduced power, knocking, leaking oil from the drive motor, or difficulty in turning or maneuvering the machine. 

    In all these cases, do not press on with the job at hand. Stop immediately and investigate the issue through the Jaltest Sany excavator troubleshooting software. Lack of proper maintenance is a common reason for the failure of the final drive motor. The motor heats up when contaminants such as dirt and debris gather around it. Cleaning the accumulated debris around the drive motor and changing the oil at stipulated intervals solves this issue.

    Engine problems

    A major problem faced by engines in mini excavators (and in all construction equipment using diesel engines) is soot build-up in the diesel particulate filter. This prevents the excavator from performing at peak levels and it can also go into limp mode. Sany excavator warning lights will inform you of this maintenance issue and you can take corrective action through Sany excavator forced regens to clear the soot. 

    Further, apart from measuring the extent of soot buildup and taking suitable action, our software also measures the pressure and temperature of the exhaust gasses to ensure that all is well with your Sany excavator engine. 

  • Hydraulic Systems Failures
  • At the heart of any excavator is the hydraulic system, providing the power needed for lifting, moving heavy loads, digging, and scraping. Given its complexities, hydraulic system failures can turn out to be frequent occurrences if periodical maintenance is not carried out. The main issues typically associated with hydraulic system failures in excavators are overheating, fluid leaks, and reduced power.

    As a preventive issue, the components of the hydraulic system should be checked periodically and any signs of wear or damage should be addressed at the earliest. Chalk out a maintenance strategy that verifies the state of the connectors, cylinders, clamps, fluid levels, hoses, and seals at least once every week. This activity alone reduces a major share of Sany excavator problems.  

  • Damage to the undercarriage
  • Whether it is Sany SY35U problems or any other model of Sany excavators, the undercarriage is an important part that must be maintained optimally if your Sany excavator has to be always on the job without downtime. The undercarriage should be kept clean and free from dirt, frozen mud, debris, and other contaminants that might pile up and lead to several problems. Further, the piled-up debris on the undercarriage weighs down the excavator thereby reducing fuel efficiency and making it harder to maneuver deftly.  

    All these issues can be prevented by frequently cleaning the undercarriage, more so if the excavator is operating in muddy or icy conditions. If the excavator is regularly on the job, clean the undercarriage after every use. To do so, pressure wash the undercarriage or use a jet nozzle to spray away the dirt and debris. 

    Do so carefully so that the pressure does not damage any vulnerable components of the undercarriage. Also, avoid using corrosive cleaning agents that might damage rubber products such as seals. This maintenance activity avoids unnecessary service costs and extends the lifecycle of the excavator. 

    Summing up

    Sany excavators are incredible machines that can work in some of the most challenging terrains under the harshest conditions. To keep them performing without a break, constructing, excavating, landscaping, or more, optimized maintenance programs must be frequently undertaken that take care of the specific needs of these machines. 

    You can carry out comprehensive diagnosis of your excavators and solve all your Sany excavator problems with our Jaltest Sany excavator troubleshooting diagnostic software. You can carry out periodic full system scans or troubleshoot symptoms whenever any issue arises. 

    Our software has detailed diagrams of most Sany excavator problems so that diagnosis and rectification become very easy. You can undertake various functions such as calibrating transmissions and getting all information about vehicle and maintenance data. 

    Contact us to learn more about the Jaltest Sany excavator diagnostic troubleshooting software.

    Troubleshooting a Hyster Forklift

    Troubleshooting a Hyster Forklift

    Introduction

    Hyster forklifts are renowned for their robustness and reliability, but like any heavy machinery, they may encounter issues from time to time. When problems arise, it's crucial to diagnose and address them promptly to ensure the safety and efficiency of your operations. One invaluable tool in the toolkit of any Hyster owner or operator is the Jaltest Diagnostic Tool. Let's go through the process of troubleshooting a Hyster forklift using this powerful diagnostic tool.

    Understanding Hyster Forklifts

    Hyster forklifts are known for their durability and versatility, making them a popular choice in various industries. However, even the most well-maintained forklifts can experience mechanical or electrical issues. When this happens, it's important to have a reliable diagnostic tool at your disposal.

    The Jaltest Diagnostic Tool

    The Jaltest Diagnostic Tool is a comprehensive diagnostic system designed to pinpoint issues in a wide range of vehicles, including Hyster forklifts. It provides real-time data and advanced troubleshooting capabilities, making it an invaluable resource for technicians and operators alike.

    Troubleshooting Process

    1. Connecting the Jaltest Diagnostic Tool

      • Start by locating the diagnostic port on your Hyster forklift. This port is usually located in the driver's compartment or engine bay.
      • Plug the Jaltest Diagnostic Tool into the port. Ensure that the forklift's ignition is turned on.
    2. Accessing the Diagnostic Menu

      • Power on the Jaltest tool and select the appropriate vehicle manufacturer (in this case, Hyster).
    3. Scanning for Fault Codes

      • Initiate a system scan to identify any stored fault codes. The tool will communicate with the various control units of the forklift, such as the engine control module, transmission control module, and others.
    4. Interpreting Fault Codes

      • Once the scan is complete, review the identified fault codes. These codes are alphanumeric combinations that correspond to specific issues within the forklift's systems.
    5. Consulting the Hyster Troubleshooting Guide

      • Cross-reference the fault codes with the Hyster forklift's troubleshooting guide. This guide provides detailed information about each code, including potential causes and recommended solutions.
    6. Addressing the Issues

      • Depending on the identified issues, follow the recommended steps outlined in the troubleshooting guide. This may involve tasks such as inspecting wiring, replacing components, or adjusting settings.

    Hyster Forklift Dashboard Symbols

    In addition to using the Jaltest Diagnostic Tool, familiarizing yourself with Hyster forklift dashboard symbols can provide valuable insights into the forklift's current status. Common symbols include battery indicators, engine temperature warnings, and transmission alerts. Consult the Hyster forklift manual to understand the meaning of each symbol and the appropriate actions to take.

    Preventative Maintenance and Best Practices

    To minimize the occurrence of issues, implement a regular maintenance schedule for your Hyster forklift. This includes tasks such as fluid checks, lubrication, and inspections of critical components. Additionally, ensure that operators are trained in safe and proper forklift operation to prevent unnecessary wear and tear.

    Conclusion

    The Jaltest Diagnostic Tool is an indispensable asset when it comes to troubleshooting a Hyster forklift. By following a systematic approach, from connecting the tool to interpreting fault codes and consulting the Hyster troubleshooting guide, you can efficiently identify and address issues. Combine this with regular maintenance practices and operator training for a comprehensive approach to forklift care and maintenance. With these strategies in place, you'll ensure the longevity and reliability of your Hyster forklift for years to come.  Are you going to give Mechnician a call to get your Jaltest Diagnostic Tool today?

    Back to News
    Mercedes Sprinter Fault Codes List | Jaltest Diagnostic Tools - Mechnician