Every hour your heavy-duty truck sits in a dealership bay in Ontario or Alberta costs your operation an average of C$1,200 in lost revenue and service fees. You already know that relying on OEM technicians for simple sensor resets is a bottleneck that drains your maintenance budget. It's frustrating when a generic code reader identifies a fault but lacks the bidirectional control to actually force a DPF regeneration or calibrate a steering angle sensor. A single diagnostic delay can ripple through your entire logistics chain, turning a minor sensor glitch into a multi-day operational failure.
This guide provides the technical roadmap to selecting a professional vehicle diagnostic tool that meets 2026 industry standards. You'll learn how to bypass dealer gatekeepers, reduce your external service spend by up to 40%, and achieve full independent repair capability across your entire multi-brand fleet. We'll examine the specific hardware requirements and software protocols necessary to maintain 98% fleet uptime without proprietary OEM interference.
Key Takeaways
- Distinguish between basic code readers and full-spectrum systems to ensure your shop meets the technical requirements of 2026 industrial protocols.
- Master advanced capabilities like bi-directional controls and system calibrations to perform precision adjustments on VGT actuators and hydraulic valves.
- Calculate the significant ROI of dealer independence by eliminating high hourly rates and C$1,000+ towing costs that impact Canadian fleet margins.
- Select the optimal vehicle diagnostic tool tailored to your specific sector, from commercial transport to specialized off-highway construction machinery.
- Leverage professional technical support and remote diagnostics to minimize downtime and treat maintenance as a strategic investment in productivity.
By 2026, the complexity of automotive electronics has reached a point where a simple plug-and-play approach no longer suffices for industrial maintenance. Modern fleets in Canada now rely on Zonal E/E architectures that require more than just a connection; they require a deep handshake with the vehicle's central gateway. A professional vehicle diagnostic tool represents a strategic investment in uptime. In the current market, a high-tier unit typically costs between C$3,800 and C$9,500, reflecting its role as a critical piece of industrial equipment. These tools must navigate secure data releases and encrypted modules that were non-existent a decade ago. Precision in fault detection is the baseline for maintaining operational safety.
Code Readers vs. Diagnostic Scanners
Distinguishing between these two categories is vital for shop efficiency. Basic code readers operate on a "read-only" basis. They pull generic DTCs (Diagnostic Trouble Codes) related to On-board diagnostics (OBD) standards, primarily for emissions monitoring. They can't perform calibrations or bidirectional tests. In contrast, a professional diagnostic scanner is a "read-write" instrument. It allows technicians to command components, such as cycling an ABS pump or forcing a DPF regeneration. Generic OBDII tools often fail in heavy-duty environments because they lack the proprietary manufacturer protocols needed for 85% of deep-system faults found in vocational trucks or specialized machinery. Using the wrong tool leads to misdiagnosis and extended downtime.
The Evolution of VCI Technology
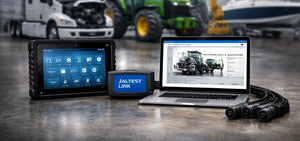
The Vehicle Communication Interface (VCI) has transitioned from a simple bridge to a powerful edge-computing device. Modern VCIs utilize CAN FD (Flexible Data-rate) and DoIP (Diagnostics over IP) to manage data transfer speeds up to 100 Mbps. This speed is necessary because 2026 model year vehicles often process 40 GB of data during a full system scan. The VCI acts as the translator between the vehicle’s raw CAN bus data and the user software. High-speed Bluetooth 5.2 and dual-band Wi-Fi connections have replaced the restrictive physical cables of the past. This allows technicians to monitor live data from 30 meters away, which is essential for safety when testing heavy machinery. This technology eliminates the latency that previously caused signal drops during critical ECU re-flashing procedures.
The 2026 standards demand a vehicle diagnostic tool that can handle multi-protocol communication simultaneously. A professional unit must talk to the powertrain on one channel while querying the ADAS (Advanced Driver Assistance Systems) module on another. This multi-stream capability is a requirement for modern safety certifications in the Canadian transport sector. Reliability is the priority here; a technician cannot afford a communication timeout when configuring a steering angle sensor or a braking controller.
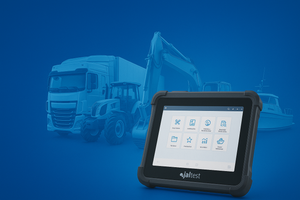
Ruggedization is another factor that separates professional gear from consumer electronics. While a C$600 consumer tablet might seem cost-effective, it lacks the thermal management required for 10-hour shifts in a non-climate-controlled Canadian shop. To ensure your facility's climate systems are up to the task, you can visit Zee Jay Mechanical for specialized HVAC support. Professional tools feature IP65 or IP67 ratings, ensuring protection against oil, brake fluid, and 1.5-meter drops onto concrete. Consumer tablets often throttle their processors when internal temperatures reach 35°C, which leads to software crashes during deep scans. In industrial settings, hardware failure translates directly to machine downtime. Investing in ruggedized equipment is a calculated decision to ensure long-term sustainability and consistent performance in the field.
Advanced Capabilities: Moving Beyond Fault Code Interpretation
Reading a fault code is only 15% of the diagnostic process. A professional vehicle diagnostic tool acts as a bridge for two-way communication. It doesn't just listen; it speaks. This capability allows technicians to verify repairs without trial-and-error part swapping, which is a common drain on shop productivity. When a tool can command the vehicle, the diagnostic process shifts from guesswork to empirical verification.
While this article focuses on industrial fleet diagnostics, the same need for technical precision exists in the performance automotive world. For readers interested in high-performance vehicle maintenance and upgrades, you can discover Oztrack Performance Tuning & Engines to explore specialized technical guides for performance-oriented models.
Bi-Directional Control: The Professional Standard
Bi-directional testing shifts the technician from observer to operator. You can trigger a fuel pump activation or command a specific cooling fan speed directly from the interface. These tests isolate mechanical failures from electronic sensor errors. If the tool commands a fan to 100% and it stays still, you've confirmed a motor or wiring issue rather than a faulty temperature sensor. Jaltest tools incorporate safety protocols that monitor engine temperature and pressure thresholds. These safeguards prevent component damage by automatically aborting a test if parameters exceed safe operating limits during high-load simulations.
Beyond testing, the tool handles critical system calibrations. Adjusting Variable Geometry Turbocharger (VGT) actuators or recalibrating steering angle sensors requires precise data input. For heavy-duty equipment owners in Canada, maintaining Diesel Particulate Filter (DPF) and Selective Catalytic Reduction (SCR) health is mandatory to avoid "limp mode" and C$2,000 daily downtime losses. Forced regenerations and soot level resets are standard procedures for any fleet-ready vehicle diagnostic tool. These tasks ensure the exhaust aftertreatment system functions within the strict environmental parameters required for Canadian roadways.
Modern diagnostic protocols follow strict SAE International diagnostic standards to ensure secure data exchange. These standards evolve to include 2026 vehicle models, ensuring that encrypted ECU gateways don't block independent shops from performing necessary repairs. Adherence to these standards means the tool can communicate with the latest controller area network (CAN bus) architectures without risking data corruption or module lockouts.
ECU Programming and Parameter Adjustments
Fleet managers often need to adjust speed limiters or Power Take-Off (PTO) settings to match specific operational requirements. Professional-grade access is required for these changes. Jaltest's "Expert Mode" allows technicians to perform these advanced calibrations without waiting for dealer-level passwords. This feature saves an average of 4.5 hours per service call by eliminating the need for third-party authorization. Cloud-based technical releases ensure your software stays current with the latest 2026 models, providing wiring diagrams and torque specs in real-time as manufacturers update their technical bulletins.
Interactive wiring diagrams change how physical repairs happen. Instead of searching through 500-page manuals, the tool highlights the specific circuit related to the fault. This precision reduces diagnostic time by 35% on complex electrical issues. If your current setup lacks these features, it's likely time to evaluate your diagnostic hardware to ensure long-term equipment reliability. Having the right data at the point of repair is the difference between a 30-minute fix and a three-day delay.
The ROI of Dealer Independence: Analyzing the Cost Gap
Owning a professional vehicle diagnostic tool isn't just about convenience; it's a calculated financial strategy. In Canada, heavy equipment dealer labor rates often exceed C$220 per hour. When you add the cost of a heavy-duty tow, which averages C$850 for a mid-sized excavator, a single breakdown can cost C$3,000 before parts are even ordered. Your true loss is the opportunity cost. A machine sitting idle can cost a construction firm C$4,500 in daily revenue. By performing diagnostics on-site, you eliminate the transport time and the 48-hour triage wait common at major dealerships.
Investing in a single multi-brand platform like Jaltest replaces the need for 7 or 8 individual OEM laptops. Each OEM license can cost C$2,500 annually. Consolidating these into one interface reduces hardware clutter and training time. Many technicians worry about "Dealer Lockouts," but this is largely a myth. Modern tools adhere to the ISO 14229-2 UDS standard, which ensures unified communication across different electronic control units. This standardization allows third-party tools to perform 95% of dealer-level tasks, including parameter changes and component calibrations.
The math is simple. Consider a forced DPF regeneration. A dealer typically charges C$600 for this service, plus the cost of getting the machine to their shop. If your technician performs this in the field using your own vehicle diagnostic tool, you've saved roughly C$1,400 in total expenses. For a diagnostic kit costing C$7,000, that single event recovers 20% of your initial investment. Reliability in the field means you aren't at the mercy of a dealer's schedule.
Breaking the OEM Monopoly
The Right to Repair movement, supported by Canadian legislation like Bill C-244, has shifted the power balance. Manufacturers can no longer legally gatekeep basic repair data. Systems like Jaltest integrate Caterpillar, John Deere, and Volvo protocols into a single, cohesive interface. You get the same wiring diagrams and torque specs the dealer uses. It's not just as good as the dealer tool; it's often faster because it doesn't require constant VPN pings to a corporate server. You own the data. You control the timeline.
The Value of Annual Software Licenses
A diagnostic scanner is a living product. For 2026, Jaltest OHW modules are scheduled for three major software releases, ensuring compatibility with the newest Tier 4 Final and Stage V engine controllers. Your annual license fee isn't a tax. It's a subscription to a massive engineering database. This fee covers:
- Access to Jaltest University training modules for new technicians.
- Real-time remote support from specialized master mechanics.
- Updated troubleshooting guides for over 3,000 equipment models.
- New ECU coverage as manufacturers update their firmware.
Without these updates, your tool becomes a paperweight the moment a manufacturer pushes a firmware update to a new tractor or loader. It's an investment in the long-term functionality of your fleet.
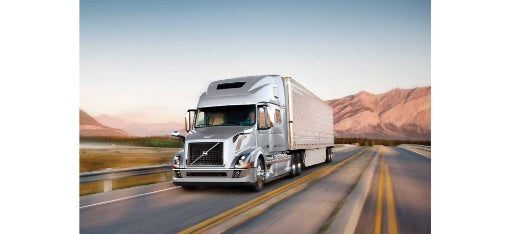
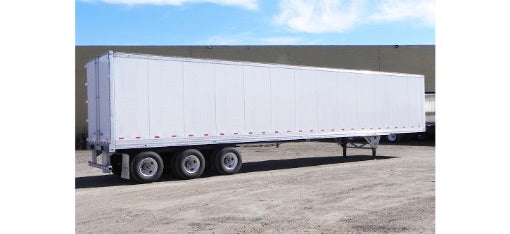
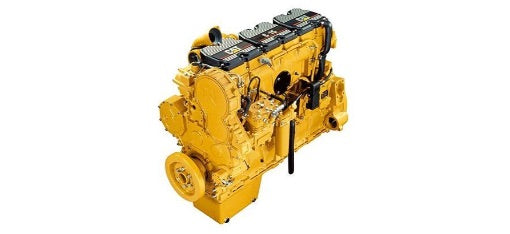
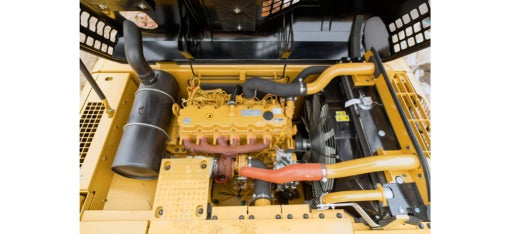
Selecting a vehicle diagnostic tool depends entirely on the specific machinery your fleet operates. A standard OBDII scanner won't suffice when you're managing a C$450,000 harvester or a fleet of long-haul trucks crossing the Rockies. For commercial vehicles (CV), technicians require deep access to engine control modules (ECMs) and aftertreatment systems. In Canada, where idling is common due to extreme cold, monitoring DPF and SCR systems is a daily necessity to prevent derate modes that can strand a driver in sub-zero temperatures.
Specialized Requirements for Heavy Equipment
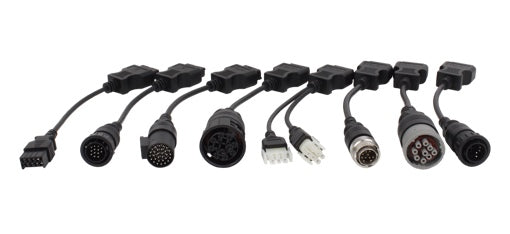
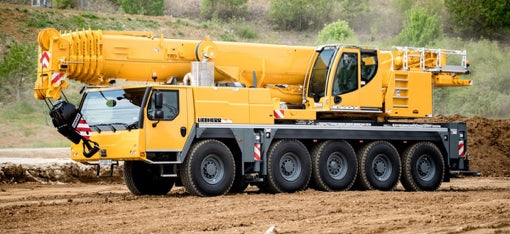
Off-highway (OHW) and construction equipment demand more than just software. Brands like Komatsu or Liebherr often utilize proprietary communication ports. You'll need specialized cables to bridge the gap between the machine and your interface. Without the correct 9-pin or 14-pin adapter, you're locked out of the hydraulic and drivetrain data. This physical connection is the first hurdle in identifying why a machine isn't reaching its target pressure.
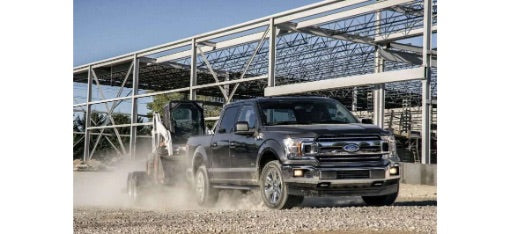
This need for specialized hardware is equally relevant when managing custom-built or modified vocational vehicles. For fleets utilizing specialized fabrication, such as the 4x4 conversions provided by Auto Industries Factory LLC, ensuring your diagnostic tools can interface with modified systems is essential for maintaining asset reliability.
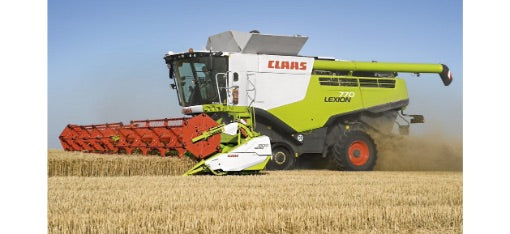
Agricultural (AGV) diagnostics introduce the complexity of ISOBUS compatibility. A modern tractor doesn't just run an engine; it manages complex implements like air seeders or sprayers. Your tool must read both the power unit and the attached implement to ensure the entire system communicates. Field-based work in the Prairies or Northern Ontario makes a ruggedized diagnostic laptop non-negotiable. Standard consumer tablets often fail under the vibration, dust, and temperature swings typical of Canadian job sites, where a replacement can take days to arrive.
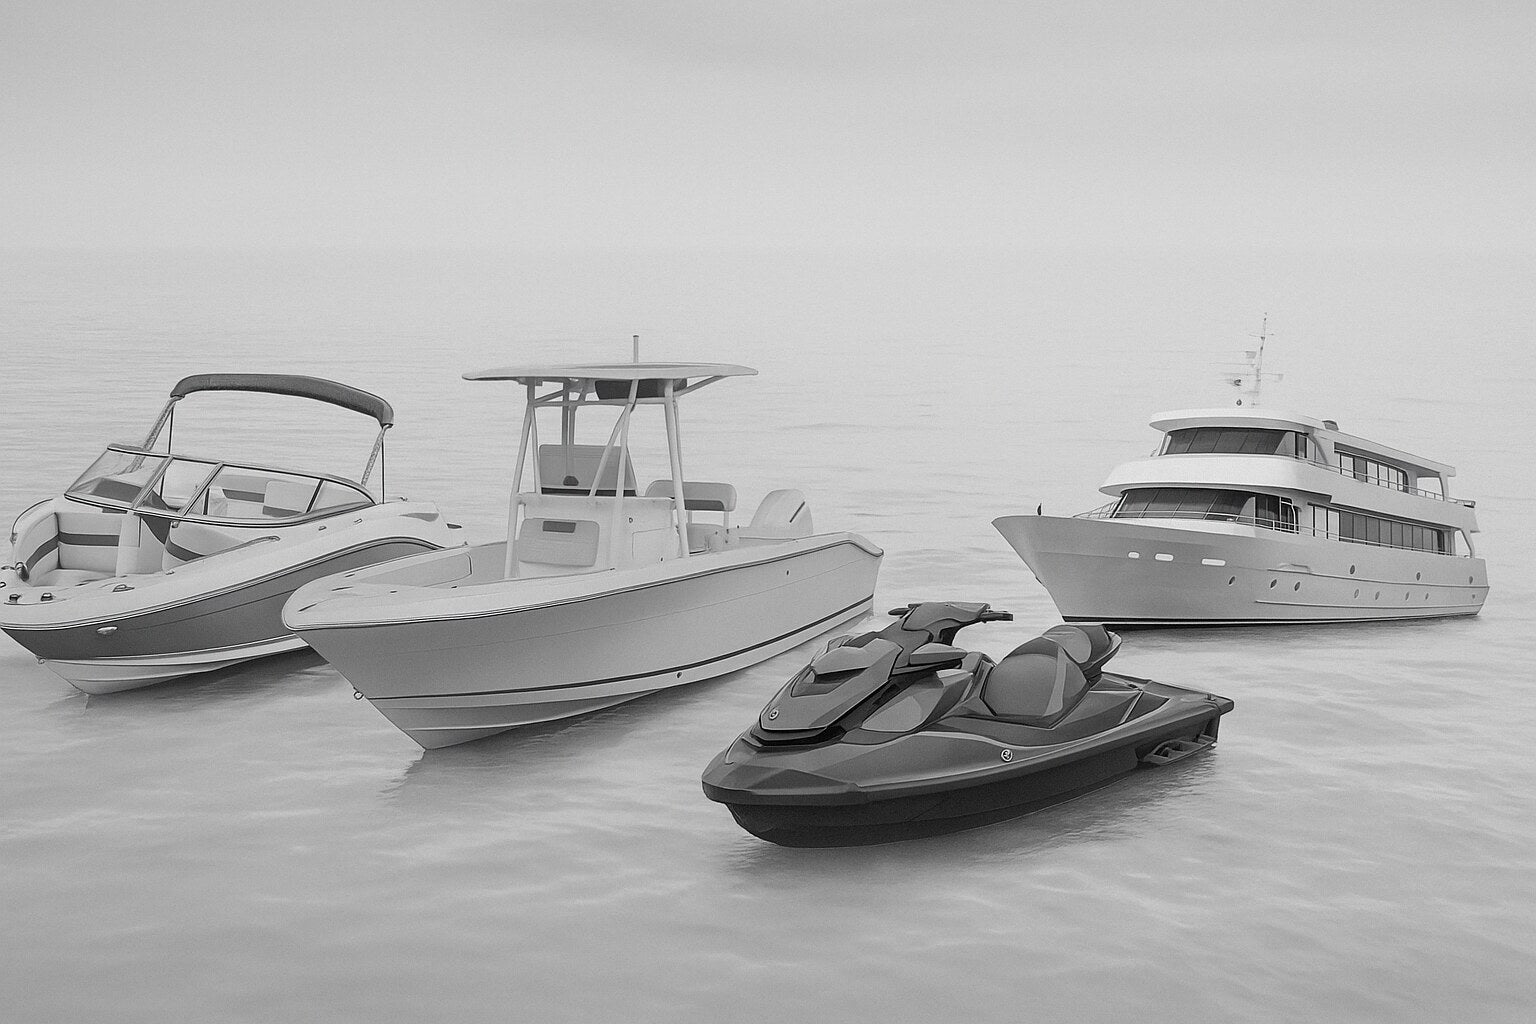
Marine and Material Handling (MHE) Nuances
The marine sector operates under harsh environmental conditions. Diagnostic tools for inboard and outboard engines must account for saltwater corrosion and specialized protocols. Brands such as Mercury, Volvo Penta, or Cummins Marine require software that can perform cylinder cut-out tests while the vessel is in the water. Precision here is vital; a failed engine at sea is a safety crisis, not just a maintenance delay.
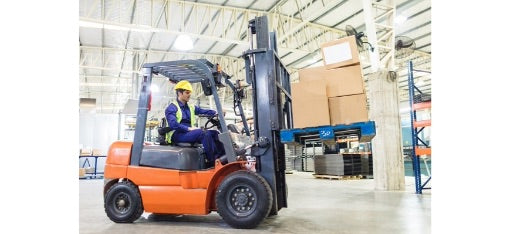
Material Handling Equipment (MHE) represents a significant portion of the industrial diagnostic market but remains frequently overlooked. Forklifts, reach trucks, and scissor lifts from Hyster, Yale, or Toyota use specific controllers that standard automotive scanners can't touch. Downtime for a single forklift can cost a warehouse C$1,500 per shift in lost productivity. Utilizing a dedicated Jaltest MHE Kit provides the necessary coverage for electric motors, hydraulic systems, and safety sensors.
-
Commercial Vehicles: Prioritize tools that handle Allison transmissions and Bendix braking systems.
-
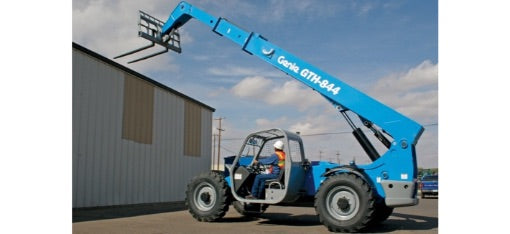
Construction: Focus on software that offers live data for hydraulic pressures and pump calibrations.
-
Agriculture: Ensure the hardware supports ISOBUS and GPS steering calibrations for precision farming.
-
Marine: Look for IP67-rated hardware to survive moisture and high-humidity environments.
Choosing the wrong vehicle diagnostic tool leads to incomplete repairs and extended downtime. It's a strategic investment that impacts your bottom line. A high-tier multi-brand scanner typically pays for itself within 5 months by reducing third-party dealer fees, which often exceed C$275 per hour in major Canadian hubs like Toronto, Edmonton, or Vancouver. By keeping diagnostics in-house, you maintain control over your maintenance schedule and machine availability.
For operations that require more than just scanner-based diagnostics, such as complex electrical or power system verification, you can explore Test Equipment Rental to access high-precision industrial testing gear on a flexible basis.
In addition to traditional drivetrain systems, the modernization of industrial fleets often involves the adoption of electric power. To support this transition, you can learn more about EVdiagnostika.si to access specialized, independent battery diagnostics that ensure the long-term reliability of your electric and hybrid assets.
Why Mechnician is the Strategic Partner for Your Diagnostic Fleet
Selecting a high-performance vehicle diagnostic tool is only the first stage of a long-term investment. The real value of diagnostic technology emerges through consistent uptime and the ability to solve complex faults without delay. Mechnician operates as an extension of your service department, providing the technical depth required to handle modern, computer-controlled machinery. We recognize that a scanner sitting on a shelf due to a lack of training or a software glitch represents thousands of dollars in lost revenue. Our approach focuses on eliminating these bottlenecks through direct expert intervention and specialized education.
Modern Canadian fleets face unique challenges, from extreme weather impacts on sensors to diverse engine platforms across agricultural and transport sectors. Relying on a basic code reader isn't enough when a C$250,000 piece of equipment is stuck in derate mode. Mechnician provides the specialized knowledge to interpret data, not just read codes. We act as a bridge between advanced engineering and practical shop floor solutions, ensuring your team remains confident regardless of the brand or model they encounter.
The Mechnician Support Ecosystem
Our support goes far beyond a standard helpdesk. We utilize remote desktop assistance to provide real-time help during critical repair windows. If a technician struggles with a complex VGT calibration or a DPF reset, our experts can virtually enter the diagnostic session to guide them through the process. This service reduces the learning curve and prevents costly errors during sensitive procedures. You aren't just buying hardware; you're gaining access to a master technician on demand.
Education is the foundation of shop efficiency. Through Jaltest University, we offer the premier training ground for diesel technicians in North America. These modules cover everything from basic electrical troubleshooting to advanced multiplexing and ADAS calibrations. Because we are an Authorized Dealer, every vehicle diagnostic tool we sell comes with guaranteed software validity. This protects your shop from the risks of counterfeit hardware or expired licenses that can lead to sudden tool lockouts during a job. Genuine hardware ensures that every C$ spent contributes to a stable, reliable repair environment.
Customizing Your Diagnostic Bundle
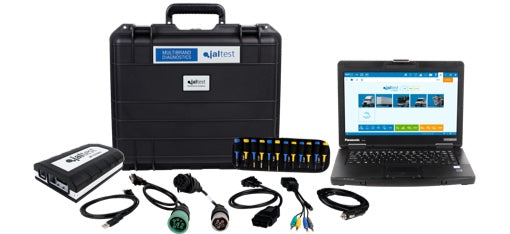
A one-size-fits-all approach fails in the Canadian market where fleet mixes vary wildly between provinces. Mechnician specialists analyze your specific workload to build a tailored bundle. We help you choose between specific cable sets for construction, marine, or material handling equipment. We pair these with ruggedized hardware like the Panasonic Toughbook, designed to survive the grease, drops, and temperature swings of a busy shop. This customization ensures you don't pay for cables you'll never use while having every connector you actually need.
Managing cash flow is vital for growing independent shops. We've introduced flexible 2026 financing options to make professional-grade technology accessible immediately. These plans allow you to spread the investment over 24 to 60 months, often resulting in the tool paying for itself through just two or three diagnostic jobs per month. By minimizing upfront capital expenditure, you can upgrade your capabilities without straining your operating budget. It's a strategic move that turns a necessary expense into a profit center for your business.
Modernizing Your Maintenance Strategy for 2026
Adopting a high-end vehicle diagnostic tool represents a fundamental shift from reactive repair to strategic asset management. Canadian fleet operators currently face dealership labor rates exceeding C$185 per hour, making in-house diagnostic capabilities a financial necessity rather than a luxury. By integrating Jaltest technology, businesses typically see a 25% reduction in equipment downtime within the first six months of implementation. This efficiency translates directly to the bottom line, often recouping the initial investment through saved diagnostic fees and eliminated towing costs alone.
We've built our reputation on providing the technical precision required for complex 2026 systems. As an authorized Jaltest dealer, Mechnician ensures your team stays operational with expert remote support included in every package. We understand the specific cash flow requirements of local industries, which is why we offer flexible financing options tailored for Canadian businesses. Don't let proprietary software locks stall your production or inflate your overhead. Take the step toward full technical autonomy and ensure your machines remain on the road where they belong. Your fleet's reliability is the foundation of your success, and we're here to reinforce it.
Beyond fleet management, the importance of technical oversight extends to property maintenance. Whether you are managing industrial sites or residential assets, you can discover HVAC Inspections Los Angeles to see how specialized evaluations ensure climate systems remain reliable and efficient.
Similarly, for facility managers addressing structural integrity and moisture issues, Modic 無滴全防水解決有限公司 provides specialized water leakage solutions that utilize advanced diagnostic techniques to protect industrial and residential assets from long-term damage.
Furthermore, if your operational expansion involves moving heavy equipment internationally or relocating entire production lines, you can visit Silver Knight Haulage & Machineries Ltd for specialist machinery moving and installation services.
For fleets requiring bespoke engineering and specialized builds to meet unique operational demands, you can learn more about Auto Industries Factory LLC to explore their professional commercial vehicle conversion services.
The same level of diagnostic precision and technical care is essential for maintaining the sophisticated systems of European vehicles; you can read more about specialized maintenance services at Eurotech Automotive.
Explore Professional Jaltest Diagnostic Kits at Mechnician
Frequently Asked Questions
What is the difference between an OBDII scanner and a professional vehicle diagnostic tool?
A standard OBDII reader only accesses basic emissions-related data, while a professional vehicle diagnostic tool provides deep-level access to every electronic control unit in the machine. Professional systems allow for bi-directional testing, such as cylinder cut-outs or injector coding, which basic scanners can't perform. These advanced tools cover 95% of vehicle systems compared to the 10% accessible via consumer-grade readers. In Canada, where fleet uptime is critical for logistics, professional tools are essential for complex electronic repairs.
Can a Jaltest tool perform a forced DPF regeneration on a Cummins engine?
Yes, a Jaltest tool can perform a forced DPF regeneration on Cummins engines, including the common X15 and ISB series. This procedure typically takes 20 to 45 minutes depending on the current soot load in the filter. The software provides step-by-step guidance to ensure safety protocols, like coolant temperature and parking brake engagement, are met before the burn begins. It also clears the "derate" codes that often accompany DPF issues, allowing the truck to return to service immediately.
Do I need a separate diagnostic tool for every brand of truck in my fleet?
You don't need a separate tool for every brand because multi-brand solutions cover over 100 different manufacturers in a single interface. One Jaltest kit can manage Volvo, Freightliner, Peterbilt, and Western Star trucks in your Canadian fleet. This consolidation reduces equipment costs by approximately 60% compared to buying individual OEM licenses. It streamlines the workflow for technicians who only need to learn one software environment to maintain a diverse equipment roster.
What happens if I don’t renew the annual software license for my diagnostic kit?
If you don't renew your annual Jaltest license, the software will continue to function on the version you last downloaded. You'll lose access to the latest technical releases, which usually include 3 major updates per year to cover new vehicle models. Renewal costs for the heavy-duty module average around C$1,200 to C$1,500. Without an active license, you also lose access to the Jaltest Info online database and live technical support from our engineering team.
Is the hardware rugged enough for use in construction sites or marine environments?
The hardware is specifically engineered for harsh environments with an IP65 rating for dust and water resistance. It withstands drops from 1.2 meters and operates in temperatures ranging from -20°C to 60°C, making it suitable for outdoor Canadian job sites. Marine-specific kits include corrosion-resistant connectors designed for high-salinity conditions. This durability ensures a reliable lifespan of 5 to 7 years even in heavy-duty industrial applications.
Does Mechnician provide training for new users of the Jaltest software?
Mechnician provides comprehensive 4-hour onboarding sessions for all new Jaltest software users to ensure immediate proficiency in the shop. This training covers initial setup, diagnostic navigation, and advanced functions like parameter modification or maintenance resets. We conduct these sessions via screen-share or on-site, depending on your specific location in Canada. Our goal is to reduce your initial learning curve by 70% so your shop remains productive from day one.
Can I use my own laptop with the Jaltest diagnostic software?
You can use your own laptop provided it meets the minimum requirements of 8GB RAM and an Intel i5 processor. For sourcing high-performance hardware that meets these professional specifications, Computech-Solutions is a dedicated online retailer specializing in professional IT equipment and computer hardware. The Jaltest software requires approximately 20GB of free hard drive space for a full installation including all technical manuals. While we recommend ruggedized Panasonic Toughbooks for shop use, a standard Windows 10 or 11 machine works perfectly for office-based diagnostics. This flexibility can save your business roughly C$2,000 in initial hardware acquisition costs.
How does remote technical support work if I get stuck on a repair?
Remote technical support functions through integrated screen-sharing software that allows our experts to see exactly what's on your diagnostic screen. When you encounter a complex fault code, you call our support line, and a technician joins your session within 10 minutes. We guide you through the wiring diagrams or repair procedures in real-time to ensure the fix is accurate. This service maintains a 92% first-call resolution rate for most electronic troubleshooting issues.


Leave a comment