Les avantages d'avoir un scanner de diagnostic de chariot élévateur
Les chariots élévateurs sont un élément essentiel de nombreuses industries et ils jouent un rôle essentiel dans le déplacement et le levage de charges lourdes. Cependant, comme toute autre machinerie, les chariots élévateurs nécessitent un entretien et des réparations réguliers pour fonctionner efficacement. L'un des outils les plus importants pour l'entretien et la réparation des chariots élévateurs est un scanner de diagnostic de chariot élévateur. Dans cet article, nous discuterons des avantages d'avoir un scanner de diagnostic de chariot élévateur.
Un scanner de diagnostic de chariot élévateur est un outil qui communique avec l'ordinateur de bord du chariot élévateur et en lit les données. Il peut identifier les problèmes avec le chariot élévateur et fournir des codes de diagnostic qui indiquent le problème, tels que les codes de diagnostic de chariot élévateur Toyota ou les codes de diagnostic de chariot élévateur Yale. Une fois le problème identifié, vous pouvez utiliser un guide de dépannage de chariot élévateur ou le même logiciel de diagnostic de chariot élévateur pour vous aider à résoudre le problème.
L'un des avantages les plus importants d'avoir un scanner de diagnostic pour chariot élévateur est qu'il permet d'économiser du temps et de l'argent. En identifiant rapidement les problèmes du chariot élévateur, vous pouvez éviter les temps d'arrêt et réduire les coûts de réparation. De plus, les scanners de diagnostic pour chariots élévateurs peuvent aider à prévenir les problèmes futurs en identifiant les problèmes potentiels avant qu'ils ne deviennent des problèmes plus importants.
Un autre avantage des scanners de diagnostic pour chariots élévateurs est qu'ils peuvent être utilisés avec différentes marques et modèles de chariots élévateurs. Par exemple, certains logiciels de diagnostic comme Logiciel de diagnostic de manutention Jaltest peut connecter de nombreuses marques de chariots élévateurs. Un outil de diagnostic de chariot élévateur Toyota peut être utilisé pour diagnostiquer les problèmes d'un chariot élévateur Toyota , tandis qu'un outil de diagnostic de chariot élévateur Cat peut être utilisé pour diagnostiquer les problèmes d'un chariot élévateur Caterpillar . Parmi les autres marques de chariots élévateurs qui peuvent être diagnostiquées avec des scanners de diagnostic pour chariots élévateurs figurent Nissan, Linde, Komatsu, Hyster et Yale. Jaltest a une grande couverture de moteur et continue à se développer sur tous les autres systèmes de chariots élévateurs. Les logiciels OEM peuvent fournir des informations plus détaillées, mais le coût et la nécessité d'avoir plusieurs licences de marques et d'utilisateurs peuvent faire des logiciels de fabrication une option coûteuse.
Lorsqu'il s'agit de choisir un logiciel de diagnostic de chariot élévateur, Jaltest s'impose comme le meilleur choix. Le logiciel de diagnostic Jaltest est spécialement conçu pour les chariots élévateurs et autres équipements industriels. Il offre une gamme de fonctionnalités qui rendent le diagnostic et la réparation des chariots élévateurs plus efficaces. Bien que le modèle de chariot élévateur n'ait que quelques années , Jaltest apporte des décennies d'expérience de diagnostic au logiciel et permet aux utilisateurs de diagnostiquer leur chariot élévateur de la même manière qu'ils le feraient sur un camion routier ou un équipement de construction avec le même logiciel.
L'un des principaux avantages du logiciel de diagnostic Jaltest est sa compatibilité avec une large gamme de marques et de modèles de chariots élévateurs. Il peut être utilisé avec les chariots élévateurs Toyota , les chariots élévateurs Yale, les chariots élévateurs Caterpillar , etc. Cela signifie que si votre entreprise utilise plusieurs marques de chariots élévateurs, vous n'avez besoin d'investir que dans un seul logiciel de diagnostic.
Le logiciel de diagnostic Jaltest offre également une interface conviviale qui facilite la navigation et l'utilisation. Il fournit des informations de diagnostic détaillées, y compris des codes de diagnostic et des guides de dépannage, ce qui rend les réparations plus rapides et plus efficaces. De plus, il offre une journalisation des données et des graphiques en temps réel, ce qui peut aider à identifier les problèmes intermittents qui peuvent ne pas être immédiatement apparents.
Un autre avantage du logiciel de diagnostic Jaltest est sa capacité à exécuter des fonctions de diagnostic avancées, telles que le codage des injecteurs et les régénérations du DPF. Ces fonctions peuvent aider à s'assurer que le chariot élévateur fonctionne à ses performances optimales et peuvent empêcher l'apparition de problèmes futurs.
En plus de ses fonctionnalités de diagnostic, le logiciel de diagnostic Jaltest offre une gamme de fonctionnalités de maintenance et de réparation. Il fournit un module de service vous permettant de conserver des enregistrements du service sur votre flotte. Le logiciel documente automatiquement votre travail, ce qui le rend très efficace. Le logiciel Jaltest propose également des instructions de réparation et des schémas de câblage, rendant les réparations plus faciles et plus efficaces.
Investir dans le logiciel de diagnostic Jaltest peut vous faire gagner du temps et de l'argent à long terme, car il peut aider à prévenir les problèmes futurs et à assurer le bon fonctionnement de vos chariots élévateurs. C'est une solution rentable qui peut aider à augmenter la productivité et à réduire les temps d'arrêt.
En ce qui concerne les équipements de diagnostic pour chariots élévateurs, de nombreuses options sont disponibles sur le marché, notamment des scanners et des logiciels de diagnostic pour chariots élévateurs. Cependant, le logiciel de diagnostic Jaltest s'impose comme le meilleur choix pour de nombreuses raisons. Non seulement il est convivial et compatible avec une large gamme de marques et de modèles de chariots élévateurs, mais il offre également des fonctions de diagnostic avancées qui continueront de croître avec chacune de leurs mises à jour logicielles.
En conclusion, un scanner de diagnostic de chariot élévateur est un outil essentiel pour les entreprises qui dépendent des chariots élévateurs. Il peut aider à diagnostiquer les problèmes rapidement et avec précision, réduisant ainsi les temps d'arrêt et les coûts de réparation. Lorsqu'il s'agit de choisir le bon logiciel de diagnostic, le logiciel de diagnostic Jaltest se distingue comme le meilleur choix en raison de sa compatibilité avec une large gamme de marques et de modèles de chariots élévateurs, une interface conviviale, des fonctions de diagnostic avancées et des fonctionnalités de maintenance et de réparation. Investir dans le logiciel de diagnostic Jaltest peut vous aider à assurer le bon fonctionnement de vos chariots élévateurs, à prévenir les problèmes futurs et, en fin de compte, à économiser du temps et de l'argent. Si vous recherchez une solution logicielle de diagnostic de chariot élévateur fiable et efficace, Jaltest est la solution.
What if the flashing light on your dashboard didn't have to mean an immediate $180 per hour service bill plus travel fees? When a machine stops mid-shift, the pressure to restore operations often leads to frustration, especially when free online lists for doosan forklift fault codes prove incomplete or outdated. We understand that every minute of downtime directly impacts your warehouse efficiency and bottom line. Relying on guesswork isn't just inefficient; it's a risk to your operational stability.
This guide provides the technical clarity needed to master these diagnostics, moving beyond simple identification toward professional-grade resolution. You'll learn how to execute the manual "pedal dance" for immediate field checks and how to leverage the Jaltest MHE diagnostic system for deeper system analysis. We'll walk through the specific processes for identifying errors, performing necessary calibrations, and utilizing the latest 2026 software updates to ensure your fleet remains safe and compliant with current industrial standards. Our goal is to provide you with a logical, engineer-led approach to maintenance that turns technical hurdles into manageable tasks.
Key Takeaways
Understand the Small Engine Control Module (SECM) architecture to distinguish between active system errors and stored historical codes.
Master the specific timing requirements of the manual "pedal dance" method to retrieve diagnostic information directly from the machine interface.
Identify common doosan forklift fault codes related to fuel systems and hydraulics to move from simple identification to effective mechanical repair.
Learn why parameter resets and calibrations are essential after replacing components to prevent the recurrence of cleared faults.
See how the Jaltest MHE Kit provides the bi-directional testing and wiring diagrams necessary for professional-grade fleet maintenance.
Understanding Doosan Forklift Fault Codes and System Architecture
Understanding the underlying architecture is the first step in accurately interpreting doosan forklift fault codes and restoring machine uptime. Modern Doosan units aren't just mechanical assemblies; they're sophisticated networks of electronic control units that communicate in real time. The SECM acts as the primary microprocessor in Doosan LPG systems to monitor engine parameters, manage fuel delivery, and log electronic faults. This module serves as the brain of the engine, constantly comparing sensor data against pre-set operational thresholds.
When a sensor detects a value outside these limits, the system generates a code. It's vital to distinguish between active faults and stored history codes. Active faults indicate a current sensor failure or out-of-range value that requires immediate attention. Stored history codes provide a snapshot of intermittent issues that occurred during previous operating hours. These historical logs are invaluable for identifying "ghost" problems that don't appear during a stationary inspection but happen under specific load conditions.
Communication between the engine, mast, and transmission is handled via CAN bus protocols. This digital "handshake" allows different parts of the forklift to work in unison. If the mast controller detects a hydraulic pressure spike, it communicates this to the engine to adjust RPMs. A common frustration occurs when the Malfunction Indicator Lamp (MIL) remains illuminated after a physical repair. This happens because the system often requires a specific number of "clean" start cycles or a digital reset to confirm that the fault is permanently resolved.
Flash Codes vs. DTCs (Diagnostic Trouble Codes)
Flash codes are retrieved by observing the rhythmic blinking of the MIL, which serves as a basic diagnostic tool for operators without specialized equipment. In contrast, Diagnostic Trouble Codes (DTCs) are alphanumeric strings that offer high-resolution data regarding the specific circuit or component at fault. As we move through 2026, the complexity of emissions standards means that digital DTCs have become the standard for accurate troubleshooting, as they provide much more granular detail than a blinking light can offer.
The Role of the VCU in Material Handling
The Vehicle Control Unit (VCU) serves as the central intelligence for the forklift, balancing power demands between the drivetrain and the hydraulic systems. It categorizes doosan forklift fault codes by severity, ranging from minor maintenance reminders to critical "Stop Engine" commands. If the VCU detects a loss of oil pressure or excessive coolant temperature, it will initiate a controlled shutdown or a "limp mode" to prevent catastrophic mechanical failure. Understanding these priority levels helps technicians decide whether a machine can finish a shift or must be tagged out immediately.
How to Read Doosan Fault Codes: The Manual 'Pedal Dance'
Field diagnostics often begin with the "pedal dance," a specific manual sequence used to extract doosan forklift fault codes without an external scanner. This method is a practical first step for on-site triage, allowing technicians to identify the general area of failure before committing to deeper teardowns. It relies on the Malfunction Indicator Lamp (MIL) to communicate system status through a series of timed light pulses. While basic, this technique requires precise execution and a clear understanding of the signaling rhythm to avoid misdiagnosis.
Timing is the most critical factor in this process. The SECM (Small Engine Control Module) only enters diagnostic mode if the sequence is completed within a strict 5-second window. If the timing is off by even a fraction of a second, the system will remain in its standard operating mode, and no codes will be displayed. This manual method is helpful for identifying clear component failures, but it lacks the depth of modern digital diagnostics. It won't show you real-time sensor voltages or the specific millisecond timing of fuel injectors, which is why many fleet managers eventually transition to a professional vehicle diagnostic tool for comprehensive maintenance.
The Manual Retrieval Sequence
To begin, ensure the ignition is in the OFF position and the forklift is on a level surface with the parking brake engaged. Turn the key to the ON position, but do not crank the engine. Within five seconds, fully depress and release the accelerator pedal three times. If successful, the MIL will begin to blink. You must count the pulses carefully. Long pulses (lasting approximately one second) represent the tens digit, while short pulses (lasting half a second) represent the units digit. For example, two long flashes followed by three short flashes indicate code 23. The system will pause between different codes, allowing you to record the entire fault history.
Common Errors During Manual Diagnostics
The most frequent reason for a failed "pedal dance" is attempting the sequence while the engine is already running. The SECM will only trigger the flash sequence from a "Key ON, Engine OFF" state. Additionally, if the accelerator pedal position sensor is faulty or out of calibration, the module may not register the three required pumps. This creates a circular problem where you cannot read the code because the component required to trigger the reading is the one that has failed. If the manual sequence fails repeatedly despite correct timing, it's a clear indicator that the issue has moved beyond basic troubleshooting. In these instances, visiting mechnician.com to explore dedicated diagnostic hardware can save hours of fruitless manual attempts.
Common Doosan Forklift Fault Codes List & Meanings
Identifying the specific meaning of doosan forklift fault codes is essential for moving from diagnosis to repair. While the manual "pedal dance" provides the numerical sequence, the interpretation requires an understanding of the specific system flagging the error. These codes act as a roadmap for technicians, narrowing down whether a problem is a simple sensor failure or a deeper mechanical issue within the drivetrain or hydraulic circuits. Accurate interpretation prevents the unnecessary replacement of functional parts, focusing your maintenance efforts where they are truly needed.
LPG and Diesel Engine Faults
Internal combustion engines rely on the SECM to monitor air, fuel, and spark. When these parameters deviate, the system logs specific errors to prevent engine damage. Common codes include:
Code 12: System Pass. This indicates that the SECM has completed its self-check and found no active faults in the engine management system.
Code 14 and 15: ECT sensor issues. These codes flag high or low voltage at the Engine Coolant Temperature sensor, which can lead to overheating or poor fuel economy if the engine stays in an open-loop cooling cycle.
Code 33: High fuel pressure. This often points to a malfunction in the injector circuit or a regulator failure, which is a frequent occurrence in high-hour LPG units.
Fault Code 91 indicates a signal failure in the Accelerator Pedal Position sensor, which often prevents the engine from exceeding idle speeds to ensure operator safety.
Hydraulic and Transmission Faults
Transmission-related errors often trigger a "limp home" mode, a protective state where the VCU restricts travel speed to prevent further damage to the clutch packs or torque converter. In the hydraulic system, doosan forklift fault codes typically highlight solenoid failures or pressure sensor discrepancies in the valve bank. If the VCU detects that a solenoid is drawing current outside of the 2026 safety specifications, it will disable that specific hydraulic function to protect the electronic control unit and the wiring harness from a short circuit.
Electric Doosan Models
Electric units utilize motor controller codes that differ significantly from internal combustion models. These faults often involve battery voltage drops, inverter over-temperature warnings, or motor phase failures. Monitoring these is critical for maintaining the longevity of the lithium-ion or lead-acid battery packs. A controller fault often indicates a communication break on the CAN bus, which requires a digital reset to restore full lifting capacity.
Advanced Emission & Aftertreatment Codes
Modern Tier 4 and Tier 5 engines require strict monitoring of exhaust systems. DPF (Diesel Particulate Filter) codes alert the operator to soot accumulation that requires a parked regeneration cycle. Similarly, SCR (Selective Catalytic Reduction) and DEF (Diesel Exhaust Fluid) quality codes monitor the exhaust treatment process. If the DEF quality falls below the required threshold, the system will initiate a staged de-rate, eventually limiting the forklift to a crawl until the fluid is replaced and the system is reset using professional software.
Beyond the List: Advanced Troubleshooting and Calibrations
Simply identifying doosan forklift fault codes is only the first half of a successful repair. Many technicians make the mistake of clearing a code and assuming the job is finished, only to have the Malfunction Indicator Lamp (MIL) return during the next duty cycle. In modern material handling equipment, a fault code is a symptom of a systemic imbalance. If you replace a mass airflow sensor or a fuel injector without performing a parameter reset, the ECU continues to apply the old compensation values to the new hardware. This misalignment leads to poor fuel efficiency, rough idling, and eventually, the return of the same error code.
Diesel models from 2026 require even more specific intervention, particularly regarding the exhaust aftertreatment system. When the DPF (Diesel Particulate Filter) reaches a critical soot load, the machine may refuse to initiate a standard passive regeneration. In these cases, a "Forced DPF Regeneration" is necessary to clear the filter and reset the counter. This process requires a bi-directional diagnostic tool to command the engine to increase exhaust temperatures while the vehicle is stationary. Without this capability, the forklift will remain in a permanent de-rate mode, effectively halting your operations.
The Calibration Gap
Manual methods like the "pedal dance" provide no way to recalibrate a new throttle body or adjust hydraulic pressure relief settings. This is where the calibration gap occurs. To bridge this, many professionals apply the logic found in the Jaltest CV Kit to heavy-duty forklift systems, ensuring that every replaced component is digitally synchronized with the Vehicle Control Unit. Ignoring this step often results in "ghost codes," which are recurring errors that don't point to a failed part but rather to a wiring harness integrity issue or a calibration mismatch.
Using Specialized Diagnostic Cables
Accessing the deeper layers of the ECU requires more than just generic hardware. Doosan units typically utilize either 6-pin or 9-pin Deutsch connectors, depending on the engine manufacturer and the year of production. Using high-quality, specialized diagnostic cables is vital to prevent data corruption during the ECU flashing or calibration process. A loose connection or a poorly shielded cable can interrupt a parameter reset, potentially bricking the control module and leading to expensive hardware replacements. Mechnician focuses on providing these precision-engineered connections to ensure that your diagnostic sessions are stable and reliable. If you want to eliminate the guesswork and gain full control over your fleet's maintenance, explore the professional kits available at mechnician.com to secure the right tools for your specific model.
Optimizing Fleet Maintenance with Jaltest MHE Diagnostics
Transitioning from the manual pedal dance to a digital platform represents a shift from reactive troubleshooting to proactive fleet management. The Jaltest MHE (Material Handling Equipment) Kit provides a comprehensive solution for interpreting doosan forklift fault codes with surgical precision. Unlike manual methods that only offer a numerical sequence, this diagnostic system provides a deep look into the engine control module, allowing technicians to view live data streams and sensor voltages in real time. This level of detail is necessary to confirm whether a fault is a simple sensor failure or a more complex electronic communication issue within the CAN bus network.
The system's bi-directional testing capability allows you to command the forklift's components directly from the laptop. You can activate solenoids, test hydraulic valves, or run injector cut-out tests to isolate mechanical failures without unnecessary disassembly. Coupled with integrated wiring diagrams and component location guides, the Jaltest MHE Kit transforms the diagnostic process into a logical, step-by-step workflow. This engineering-led approach ensures that repairs are performed correctly the first time, minimizing the risk of recurring downtime and operational halts.
The Jaltest Advantage for Forklift Fleets
Warehouse environments often house a mix of equipment brands. The Jaltest MHE Kit offers multi-brand coverage, allowing your team to diagnose Doosan, Hyster, Yale, and Toyota units with a single interface. This eliminates the need for multiple proprietary tools and simplifies the training process for your maintenance staff. To withstand the rigors of a warehouse, Mechnician provides Ruggedized Diagnostic Laptops built to handle dust, vibrations, and accidental drops. These units are far more reliable than consumer-grade tablets, ensuring your diagnostic tools remain functional in the harshest industrial conditions.
Investment and ROI for Independent Shops
The financial logic for investing in professional diagnostics is clear when considering the costs of external service. Avoiding even a single dealer service call provides immediate relief to your maintenance budget. By bringing these capabilities in-house, your shop gains the autonomy to perform resets and calibrations that previously required a factory technician. Mechnician supports this transition with flexible financing options for the Jaltest MHE Kit and dedicated Jaltest technical support to assist with complex troubleshooting for doosan forklift fault codes and other system errors. This partnership ensures that your facility maintains the highest levels of safety and productivity.
Securing Operational Stability through Precision Diagnostics
Mastering doosan forklift fault codes is the foundation of a resilient warehouse operation. While the manual pedal dance serves as a reliable field triage method, the increasing complexity of 2026 emissions standards and electronic control units demands a more granular approach. Moving beyond simple code retrieval to perform essential calibrations and parameter resets ensures that your repairs are permanent rather than temporary fixes. This transition from reactive troubleshooting to proactive fleet management is what separates efficient shops from those constantly battling unexpected downtime.
Taking control of your maintenance schedule reduces reliance on external service providers and significantly lowers operational costs. As an authorized Jaltest dealer, we provide the specific hardware and expertise needed to integrate professional diagnostics into your daily workflow. We offer ruggedized diagnostic laptop bundles and expert remote technical support to ensure your team has the resources required for any technical challenge. It's time to move toward a more predictable maintenance model. Empower your shop with the Jaltest MHE Diagnostic Kit and secure the long-term stability of your material handling operations. With the right tools in hand, your fleet's continuous performance becomes a calculated certainty.
Frequently Asked Questions
How do I clear the fault codes on my Doosan forklift without a scanner?
You can clear non-critical codes by disconnecting the battery for several minutes or by completing a specific number of clean start-and-run cycles without the fault reoccurring. However, this won't fix the underlying issue. If the SECM detects the same out-of-range value, the light will return immediately. For permanent resolution and to ensure safety compliance, a digital reset via a diagnostic tool is the standard professional approach.
Can I use an OBD-II car scanner on a Doosan forklift?
No, standard OBD-II car scanners aren't compatible with Doosan forklifts because they use different communication protocols and physical connectors. While cars use OBD-II, industrial equipment relies on CAN bus J1939 or proprietary manufacturer protocols. You'll need an MHE-specific tool and the correct 6-pin or 9-pin Deutsch cable to establish a stable connection with the Vehicle Control Unit.
What does a solid MIL light mean if the forklift still runs?
A solid Malfunction Indicator Lamp (MIL) usually indicates that a non-critical fault is active or that a previous fault has been stored in the system history. Even if the machine appears to run normally, it might be operating with reduced efficiency or bypass certain safety checks. Ignoring a solid light can lead to more severe mechanical failures or unexpected shutdowns during critical warehouse operations.
How many times do I need to pump the pedal to see the codes?
You must depress and release the accelerator pedal exactly three times within a five-second window after turning the key to the "ON" position. This specific timing triggers the SECM to enter diagnostic mode. If you don't complete the pumps within this timeframe, the system won't initiate the flash sequence. Consistency is key to successfully retrieving doosan forklift fault codes manually.
Why does my Doosan forklift lose power when the service light comes on?
This loss of power is known as "limp mode" or a "staged de-rate," which is a protective measure programmed into the VCU. When a critical fault is detected, the system restricts engine RPM or travel speed to prevent catastrophic damage. This allows the operator to move the machine to a service area without risking total engine or transmission failure under heavy load.
Is there a difference between Daewoo and Doosan fault codes?
Many older Daewoo models share the same fundamental engine architecture and fault logic as early Doosan units. However, as Doosan transitioned to modern Tier 4 and Tier 5 engines, the electronics became significantly more complex. While basic flash codes might overlap, modern Doosan units require updated diagnostic software to access the proprietary data layers that weren't present in legacy Daewoo machines.
What is the most common cause of Code 22 on a Doosan LPG unit?
Code 22 on a Doosan LPG unit most commonly indicates a low oil pressure signal or a failure in the oil pressure sensor circuit. This is a critical fault that the SECM monitors to protect the internal engine components. You should immediately check the oil levels and the integrity of the sensor's wiring harness before attempting to restart the engine or clear the code.
How do I update the software on my Jaltest MHE diagnostic tool?
You can update your Jaltest MHE diagnostic tool by launching the Jaltest Software Manager on your ruggedized laptop while connected to the internet. The software receives major updates three times a year, which include new models and expanded system coverage. Regular updates are essential to ensure you have the latest troubleshooting guides and bi-directional capabilities for the newest forklift models entering the market.
What if the dreaded "countdown to shutdown" on your dashboard isn't a sign of mechanical failure, but a data validation error you can resolve without a dealer visit? It's a scenario every fleet owner and technician fears. An unpredictable emissions derate halts productivity and leads to expensive diagnostic fees. The confusion between a failing NOx sensor and poor DEF quality often results in unnecessary parts replacement and hours of lost time.
You deserve a more precise way to maintain your equipment. This guide will help you master professional SCR system troubleshooting by utilizing data-driven diagnostic protocols to identify the root cause of faults and clear derate conditions independently. We'll examine the latest EPA "Freedom to Fix" standards, technical SPN/FMI code interpretation, and the precise steps needed to validate NOx conversion efficiency using modern diagnostic software like Jaltest version 26.1. By shifting your focus from mechanical guesswork to systematic data analysis, you can ensure your fleet stays on the road and out of the service bay.
Key Takeaways
Understand the critical role of Selective Catalytic Reduction in meeting 2026 Tier 4 Final and Stage V emissions standards.
Learn to distinguish between fluid quality issues, sensor inaccuracies, and mechanical dosing failures to avoid replacing functional parts.
Master the interpretation of SPN and FMI codes within the J1939 protocol to perform precise SCR system troubleshooting.
Implement a structured diagnostic protocol that prioritizes full system scans and physical inspections to isolate root causes efficiently.
Gain the technical independence to clear derate conditions and manage emissions faults using professional Jaltest diagnostic kits.
Navigating SCR System Troubleshooting in 2026 Engines
SCR system troubleshooting is the precise process of identifying and resolving failures within the Selective Catalytic Reduction loop. For 2026 engines, this task is no longer just about fixing physical leaks or clogged lines. It's about data integrity. With the implementation of 2026 Tier 4 Final and Stage V emissions standards, the legal pressure on manufacturers has increased significantly. This pressure translates directly to the operator through stricter software monitoring and more aggressive fault detection.
Modern engines treat the "Emissions Derate" as a non-negotiable legal obligation. It isn't a hardware protection feature designed to save the engine from physical damage; it's a compliance mechanism. 2026 models feature enhanced data validation protocols for NOx conversion that are far more sensitive than previous generations. These systems are designed to detect not just total sensor failures, but subtle inaccuracies that suggest the catalyst isn't meeting its targets. Following the EPA's July 1, 2026 guidance, owners have more rights to access this diagnostic data, but the systems remain technically demanding. If the data points don't align perfectly, the engine's control logic will initiate a shutdown sequence.
The SCR Logic Loop: How Your Engine Sees Emissions
The engine views the SCR system as a continuous mathematical equation. An upstream NOx sensor measures the raw pollutants exiting the engine, while a downstream "cleanup" sensor measures the final output after the catalyst. By comparing these two data points, the ECU calculates the "Conversion Efficiency." If the downstream sensor reports high NOx levels despite active DEF injection, the system flags a fault. The DEF dosing control unit manages this stoichiometric balance. It must inject the exact amount of urea required to neutralize pollutants without leaving excess ammonia. When this balance fails, SCR system troubleshooting becomes necessary to determine if the fault lies in the fluid, the sensors, or the catalyst itself.
Warning Stages and the Countdown to Shutdown
The transition from a minor fault to a full shutdown follows a disciplined sequence. It usually starts with a DEF Lamp or a flashing Check Engine light. If the fault persists, the engine enters the three stages of derate. First, you'll experience a torque reduction, which often limits power by 25 percent. If the issue isn't resolved, the software applies a speed limitation, typically capping the vehicle at 5 miles per hour. The final stage is an idle-only mode that effectively renders the machine useless. Emissions Inducement is a programmed software strategy that progressively degrades engine performance to compel the operator to repair emissions-related faults. Understanding these stages is critical for maintaining operational stability and avoiding total downtime.
The Primary Culprits: Identifying the Root Cause of SCR Faults
Effective SCR system troubleshooting requires moving beyond simple part replacement. While a "circuit open" code points directly to a severed wire or a dead component, "implausible data" codes represent the real challenge for technicians. These faults occur when a sensor is electrically functional but reports values that don't align with the engine's operating logic. Distinguishing between a failed component and a wiring harness integrity issue is the first step in a professional diagnostic process. High resistance in a connector can mimic a failing sensor, leading many to replace expensive parts unnecessarily.
We must also consider the health of the engine upstream. The SCR catalyst is a sensitive chemical reactor. If the engine experiences oil carryover or internal coolant leaks, these fluids eventually reach the aftertreatment system. Oil soot can coat the catalyst substrate, while coolant can cause thermal shock or chemical "poisoning." In these cases, the SCR fault is merely a symptom of a deeper mechanical issue within the engine block or turbocharger. Success depends on viewing the exhaust stream as a continuous data set rather than a series of isolated parts.
NOx Sensor Failure and Signal Drift
The most common "invisible" failure is sensor drift. A drifted sensor provides a voltage signal that the ECU accepts as valid, but the data is inaccurate. For example, a sensor might report 50ppm of NOx when the actual output is 200ppm. This discrepancy causes the ECU to miscalculate the required DEF dose, eventually triggering a conversion efficiency fault. Moisture or soot contamination typically "poisons" the ceramic sensing element over time. To identify this, technicians should use specialized diagnostic cables and software to perform bi-directional response time tests, which reveal if a sensor has become "lazy" or unresponsive to exhaust changes.
DEF Quality and Contamination Issues
Diesel Exhaust Fluid is a precise mixture of 32.5 percent high-purity urea and deionized water. If this concentration shifts due to age or evaporation, the system's chemical balance fails. Even if the tank is full, the ECU will trigger a fault if the NOx reduction doesn't meet the expected map. Using a refractometer is the only reliable way to verify fluid integrity. Contamination is another critical factor. Even a few drops of diesel fuel or engine oil in the DEF tank can damage the urea quality sensor and destroy the dosing pump's internal seals.
Dosing System and DEF Pump Failures
Mechanical failures often center on the dosing valve and the supply pump. Crystallization, often called the "white death," occurs when DEF dries inside the injector or lines, creating stubborn blockages. This is frequently caused by a failed purge cycle, where the system fails to vacuum the lines empty after the engine stops. Monitoring pump pressure fluctuations during operation can help you identify a failing pump before it reaches a total shutdown state. In cold climates, verifying the heating circuit's integrity is essential to ensure fluid remains liquid and flows correctly through the system.
Interpreting SCR Diagnostic Data: SPN and FMI Codes
Professional SCR system troubleshooting requires a deep understanding of the J1939 communication protocol. Unlike passenger vehicles that rely on generic P-codes, heavy-duty and off-highway equipment use Suspect Parameter Numbers (SPN) and Failure Mode Identifiers (FMI). A generic OBD-II reader might tell you there's an emissions fault, but it won't provide the granularity needed to fix it. It might show a broad "NOx Sensor" error, whereas a professional tool identifies exactly which sensor is failing and whether the fault is electrical, mechanical, or data-driven.
The FMI is particularly critical because it defines the nature of the failure. For instance, an FMI 3 indicates voltage is above normal, while an FMI 10 suggests an abnormally high rate of change. Without this context, you're just guessing. To truly master the diagnostic process, you must also utilize "Freeze Frame" data. This captures the exact engine conditions at the moment the fault was triggered, such as engine load, exhaust temperature, and DEF pressure. This data is the only reliable way to identify intermittent electrical glitches that disappear as soon as the machine enters the shop.
Common SCR Fault Code Structures
Two specific codes appear frequently in modern aftertreatment systems. SPN 3226 relates to the downstream NOx sensor. If you see this with FMI 2 (erratic data), it often points to sensor "poisoning" or a wiring issue rather than a total sensor death. SPN 5394 identifies problems with the DEF dosing valve. In these cases, you must verify if the failure is electrical, such as a solenoid coil issue, or mechanical, like a crystallized blockage. For a deeper look at the protocols used in these systems, consult our Professional Vehicle Diagnostic Tool Guide, which outlines the 2026 industry standards for data communication.
Cross-Correlating Data Parameters
Diagnostic success isn't about reading one code; it's about correlating multiple data streams. For example, the ECU will only initiate DEF dosing when exhaust temperatures reach a specific threshold, typically around 200 degrees Celsius. If your software shows zero dosing, check the temperature sensors first. If the exhaust is too cool, the system is working correctly by inhibiting dosing to prevent crystallization. Similarly, compare the DEF tank header temperature against ambient air temperature. If the tank is reporting 50 degrees Celsius on a freezing day, the heater circuit is likely stuck on. Finally, always monitor the "NOx Conversion Efficiency" percentage. In a healthy 2026 engine, this should consistently stay above 80 percent during steady-state operation. If this number drops while dosing is active, you're looking at a degraded catalyst or poor fluid quality.
Professional SCR Troubleshooting Protocol: A Step-by-Step Guide
Executing a disciplined workflow is the only way to avoid the trap of "parts cannon" repairs. Professional SCR system troubleshooting begins with a full system scan to categorize codes as active or inactive. Active codes are your immediate priority; they represent the current roadblocks preventing normal operation. Inactive codes, however, provide a historical map of intermittent failures that might suggest a fraying wire or a loose connector. You can't fix what you haven't fully mapped.
Once you've scanned the system, move to a physical inspection. Look for white urea crystals around the dosing valve or pump, which indicate leaks or poor purge cycles. Check the aftertreatment harness for rub points against the chassis. Next, validate the DEF quality. A refractometer is essential here; the urea concentration must be exactly 32.5 percent. If the fluid is contaminated or degraded, no amount of sensor replacement will clear the fault. If the fluid passes, proceed to bi-directional tests to verify the pump and injector. The final step involves a system reset and a NOx sensor calibration via your software to ensure the ECU recognizes the new operating parameters.
The Importance of Bi-Directional Testing
Bi-directional testing allows you to command the DEF pump to build pressure without running the engine. This isolation is critical for identifying weak pumps or internal blockages. During a "Quantity Test," you'll measure the actual volume of fluid delivered by the injector into a graduated cylinder. A successful dosing test is the gold standard for hardware validation because it confirms the entire mechanical loop is physically capable of delivering fluid. If the hardware delivers the correct volume but the fault remains, your problem is likely electronic or chemical.
Clearing the Derate: The Software Handshake
Simply hitting "clear codes" won't exit a heavy-duty engine from an emissions derate. The ECU requires a successful "Efficiency Test" or a specific "Software Handshake" to prove the repair worked. Using the Jaltest CV Kit, you can initiate these forced system resets and monitor the progress in real time. Be aware of software inhibitors; the test won't start unless all "Interlock" conditions are met. This typically includes reaching a specific coolant temperature and ensuring the parking brake is set. To equip your shop with these professional capabilities, you can browse our complete range of diagnostic kits and ruggedized laptops designed for industrial environments.
Eliminating Dealer Dependency with Jaltest Diagnostic Solutions
Many fleet operators believe they're permanently locked into dealer service cycles for emissions repairs. This misconception often leads to unnecessary towing costs and days of lost productivity while waiting for a service slot. However, the EPA's July 1, 2026 "Freedom to Fix" guidance has reinforced the right for independent shops and owners to access the same level of diagnostic data as franchised dealers. Mechnician empowers your team by providing the tools necessary to perform advanced SCR system troubleshooting without external reliance. By using Jaltest version 26.1 software, you gain the ability to communicate with the engine control module just as a factory technician would.
The primary advantage of Jaltest OHW and CV kits is their multi-brand coverage. Whether you're managing a Cummins engine in a truck or a Volvo power unit in an excavator, a single interface handles the entire fleet. You don't need a dozen different OEM subscriptions or proprietary cables. The software integrates technical data, wiring diagrams, and component locations directly into the diagnostic flow. If you're looking for the DEF dosing valve or a specific NOx sensor connector, the software shows you exactly where it is on the chassis. This integrated approach allows you to perform SCR calibrations and efficiency tests on-site, immediately after the physical repair is complete.
The Mechnician Advantage: Beyond the Tool
Owning the hardware is only half of the solution. Mechnician provides a professional support ecosystem to ensure your success in complex SCR system troubleshooting scenarios. If you encounter a fault code that doesn't follow standard logic, our remote technical support can assist in interpreting the data stream. We also prioritize professional development through Jaltest University training, which covers the nuances of modern Stage V and Tier 4 Final systems. For businesses looking to upgrade their shop capabilities, we offer flexible financing options for acquiring full ruggedized diagnostic bundles, including laptops and specialized cables.
Future-Proofing Your Fleet Maintenance
Transitioning to an all-makes diagnostic strategy is a conscious decision for long term stability. Instead of reacting to a "countdown to shutdown," you can use Jaltest software to monitor SCR health trends during routine maintenance. By checking NOx conversion percentages and pump pressure stability before a fault occurs, you can identify a failing component during scheduled downtime. This proactive stance transforms technical oversight from a recurring expense into a strategic asset. Stop paying for dealer lockouts and take control of your uptime. Explore Jaltest Diagnostic Kits at Mechnician to find the right solution for your equipment.
Mastering Your Fleet's Operational Stability
Transitioning to internal diagnostics is a strategic shift toward long-term sustainability and reduced downtime. You've learned that effective SCR system troubleshooting requires a move away from trial-and-error part replacement toward a rigorous data-driven validation process. By interpreting SPN and FMI codes and executing bi-directional dosing tests, you can resolve the complex "implausible data" faults that often baffle standard shops. This systematic approach ensures that every repair is backed by technical evidence rather than guesswork.
As an Authorized Jaltest Dealer, Mechnician provides the precise tools needed to maintain compliance with 2026 emissions standards. Our ruggedized diagnostic laptop bundles and expert remote technical support ensure your technicians have the resources to handle any aftertreatment challenge directly in your own facility. Investing in these capabilities doesn't just save on dealer fees; it secures your organization's operational independence.
With the right data and professional-grade equipment, the "countdown to shutdown" becomes a manageable technical task rather than a financial crisis. Your fleet's continuous operation is now within your direct control.
Frequently Asked Questions
Why does my truck say 'SCR System Fault' but I have plenty of DEF?
An SCR System Fault indicates a chemical or data failure in the reduction loop, not necessarily a low fluid level. The ECU calculates the conversion efficiency by comparing upstream and downstream NOx readings. If the reduction is insufficient due to a degraded catalyst or a drifted sensor, the system flags a fault even if the DEF tank is completely full. Systematic SCR system troubleshooting is required to identify which sensor or component is reporting the mismatch.
Can a bad NOx sensor cause my engine to go into limp mode?
A malfunctioning NOx sensor is a primary trigger for emissions inducement, commonly known as limp mode. If the ECU receives erratic or out-of-range data from these sensors, it can't verify emissions compliance. To ensure the engine meets legal standards, the software will progressively reduce torque and vehicle speed until the sensor is replaced and the system is recalibrated. This is a legal requirement for 2026 engines to prevent excessive pollutants.
How do I know if my DEF fluid is contaminated or just old?
You can accurately determine fluid integrity by using a professional refractometer to measure the urea concentration. High-quality Diesel Exhaust Fluid must maintain a 32.5 percent urea concentration to function correctly. If the reading is lower, the fluid has aged and the water has evaporated. If the fluid appears cloudy or smells like diesel, it's contaminated and requires a complete system flush to prevent pump damage.
Is it possible to clear an SCR derate code with a basic code reader?
Basic code readers lack the bi-directional capabilities required to perform the software handshake needed to exit a derate. While a generic tool might clear the "Check Engine" light temporarily, the ECU won't lift the speed or torque limitations until it sees a successful efficiency test. Professional SCR system troubleshooting requires tools that can command the system to perform these specific reset and calibration procedures.
What is a 'dosing test' and why is it necessary for troubleshooting?
A dosing test is a manual command that forces the DEF pump to build pressure and the injector to spray a measured volume of fluid. It's necessary because it isolates the mechanical components from the engine's software logic. By measuring the output in a graduated cylinder, you can confirm if the pump and injector are physically capable of meeting the dosing requirements without the engine running.
Will a faulty DPF system cause an SCR system fault?
A failure in the DPF system can indirectly trigger SCR faults by altering exhaust temperatures or increasing soot loading. If the DPF is clogged, it may prevent the exhaust from reaching the 200 degree Celsius threshold required for SCR operation. This thermal imbalance often leads to crystallization in the dosing valve, which then requires extensive cleaning or component replacement to resolve the resulting emissions codes.
How much does it cost to replace a NOx sensor vs. repairing the harness?
Repairing a damaged wiring harness is significantly more cost-effective than replacing a functional NOx sensor. Technicians often find that "sensor failure" codes are actually caused by high resistance in a corroded connector or a pinched wire. Performing a continuity test on the harness before purchasing new components is a standard protocol that prevents unnecessary spending on expensive electronic parts that aren't actually broken.
Do I need a specific diagnostic cable for SCR troubleshooting on a Mack or Volvo truck?
Mack and Volvo trucks frequently utilize proprietary communication pins that require specialized diagnostic cables for full system access. While a standard 9-pin connector might provide basic engine data, you'll need the correct 8-pin or specialized OBD-II cable to perform SCR resets and calibrations. Jaltest kits are specifically designed to include these connectors so you aren't locked out of dealer-level functions on these specific brands.
The most expensive tool in your bay isn't the one you've already paid for; it's the one you haven't bought yet because of dealer lockouts and proprietary software barriers. While traditional tool truck credit often carries interest rates as high as 28.9%, treating your diagnostic suite as a strategic asset rather than a personal debt changes the math entirely. Smart diesel mechanic tool financing allows you to bypass the massive upfront costs of ruggedized laptops and software licenses, turning a heavy capital expenditure into a manageable monthly operating cost.
It's frustrating to watch billable hours vanish because you lack dealer-level access to a specific ECU or hydraulic system. You understand that diagnostic speed is the foundation of shop efficiency, yet the high entry price of all-makes systems like Jaltest kits can feel like a barrier to growth. Discover how to leverage specialized financing to acquire dealer-level diagnostic technology and maximize your shop’s revenue potential. We'll explore how to lower your monthly overhead through commercial lending and use the Section 179 tax deduction to accelerate your return on investment.
Key Takeaways
Learn why fixed-term commercial equipment financing offers superior stability and lower interest rates compared to traditional revolving tool truck credit.
Discover how to reclaim lost revenue by investing in all-makes diagnostic kits that eliminate the high cost of dealer lockouts and outsourced repairs.
Understand the specific eligibility and credit requirements for diesel mechanic tool financing to ensure your shop qualifies for the latest 2026 technology.
See how a strategic investment in Jaltest hardware and software licenses can generate significant ROI by increasing bay efficiency and billable hours.
Explore flexible options for financing a complete diagnostic ecosystem, including ruggedized laptops, specialized cables, and annual software renewals.
In the current industrial landscape, the definition of a complete toolkit has undergone a fundamental transformation. For years, diesel mechanic tool financing focused almost exclusively on physical assets like impact wrenches, torque multipliers, and heavy-duty lift equipment. As of July 2026, the market has shifted. Modern heavy-duty vehicles operate on complex interconnected subsystems and dozens of Electronic Control Units (ECUs), making diagnostic software the primary revenue driver for any independent shop. Financing is no longer just a way to fill a cabinet; it's a strategic bridge to dealer-level repair capabilities that were previously out of reach for smaller operations.
The Evolution of the Diesel Technician’s Toolbox
The transition from mechanical troubleshooting to digital interfacing is complete. While a starter set of hand tools still costs between $10,000 and $15,000 according to 2025 estimates, these physical tools cannot clear a derate or force a DPF regeneration. Diagnostic kits have become the highest-priority investment because they dictate which jobs a shop can actually accept. With the diagnostic scan tools market valued at approximately $42.96 billion this year, the pressure to maintain all-makes coverage across commercial vehicles, agricultural machinery, and off-highway equipment is intense. Financing allows shops to acquire this coverage without depleting the cash reserves needed for daily operations.
Why Traditional Credit Often Fails Diesel Techs
Standard consumer credit products are rarely designed for the unique lifecycle of professional diagnostic equipment. Many technicians rely on personal credit cards or high-interest tool truck lines, but these options often carry heavy burdens. Research indicates that some tool truck credit rates can reach as high as 28.9% in the US, while representative APRs in other regions sit around 16.04%. These rates are particularly punishing when applied to software-heavy kits that require annual license renewals.
Industry-specific commercial lending offers a more logical structure for the following reasons:
Fixed Terms: Unlike revolving credit, commercial loans provide predictable monthly payments that align with the shop's cash flow.
Asset Recognition: Specialized lenders understand that a Jaltest CV Kit or a ruggedized diagnostic laptop is a professional asset with a measurable return on investment.
Full Ecosystem Coverage: Financing can cover the hardware, specialized diagnostic cables, and the initial Jaltest Software Annual License simultaneously.
Relying on the wrong type of credit creates a debt trap that limits a shop's ability to upgrade when new software versions or hardware standards emerge. Choosing professional diesel mechanic tool financing ensures that the technology remains an asset that generates billable hours rather than a liability that drains profits.
Commercial Financing vs. Tool Truck Credit: A Comparison
Choosing the right vehicle for diesel mechanic tool financing is as critical as choosing the diagnostic software itself. Many technicians default to the familiar tool truck credit model, yet this revolving line of credit is often ill-suited for high-value diagnostic ecosystems. While a tool truck account works for a single hand tool, it becomes a significant financial burden when applied to professional grade diagnostic suites. Commercial equipment financing offers a structured alternative that treats diagnostic tools as a business investment rather than a personal expense.
The "Tool Truck" Debt Trap
Revolving credit lines from mobile distributors often carry high interest rates that can range from 9.9% to 28.9%. These programs prioritize weekly payment cycles, which can create a misleading sense of affordability. For a technician, the psychological pressure of a weekly visit can lead to payment focused buying rather than ROI focused investing. Because these are often personal credit lines, high utilization can negatively impact your personal credit score, making it harder to secure home or auto loans later. This model lacks the long term stability needed for a shop looking to scale its diagnostic capabilities.
Advantages of Commercial Equipment Loans
Commercial equipment financing provides a more disciplined approach to growth. For borrowers with strong credit, rates in 2026 typically sit between 6% and 15% from traditional banks. These are fixed term loans with predictable monthly payments, allowing for precise cash flow forecasting. One of the primary benefits is the ability to bundle the entire ecosystem into a single agreement. You can include the Jaltest OHW Kit, specialized diagnostic cables, and even your initial Jaltest training into one manageable payment plan. This ensures your team is ready to use the equipment immediately without additional out of pocket costs.
The tax implications also favor the commercial route. Under Section 179, businesses in 2026 may be able to expense up to $1,160,000 of qualifying equipment in the year of purchase. This allows you to deduct the full cost of your diagnostic suite from your gross income, significantly lowering the effective cost of the investment. By keeping these assets on a business credit profile, you protect your personal financial health while building a professional credit history for your shop. If you are ready to move beyond the limitations of revolving credit, you can explore structured financing options for your next diagnostic kit.
Calculating ROI: How Diagnostic Tools Pay for Their Own Financing
The primary hurdle for many shop owners is viewing advanced equipment as a sunk cost. However, professional diesel mechanic tool financing shifts the perspective toward asset utilization and long term stability. When you calculate the Return on Investment (ROI), the focus moves from the monthly payment to the revenue generated by each diagnostic session. Every time a vehicle is towed to a dealer for a simple fault code clearance or a DPF regeneration, your shop loses both the service fee and the potential labor hours. By keeping these tasks in-house, independent shops can capture a growth opportunity estimated at 40% simply by eliminating the "dealer lockout" phenomenon.
Eliminating Third-Party Diagnostic Fees
Outsourcing diagnostics introduces hidden costs that extend far beyond the line item on a dealer's invoice. You have to account for towing fees, the administrative burden of coordinating with another facility, and the multi-day wait times that keep a bay occupied with a non-performing vehicle. Industry data suggests that a single dealer diagnostic hookup can cost between $150 and $350 per instance, excluding labor or repairs. Performing your own calibrations and parameter changes means these funds stay within your business. In many cases, performing just two or three advanced diagnostic procedures per month generates enough revenue to cover the entire cost of the financing installment.
Increasing Shop Throughput with Jaltest
Efficiency is the only way to scale a repair business. Using a Jaltest CV or OHW kit allows your technicians to identify fault codes across multiple brands using a single interface, which drastically reduces the time spent switching between OEM tools. When a technician encounters a complex system error, they can leverage Jaltest technical support to resolve the issue without second-guessing the data. This speed translates directly into higher shop throughput.
By reducing the time spent on each diagnostic phase, you increase the number of billable hours your team can generate each week. A shop that previously handled five major diagnostic jobs a week might find they can now manage seven or eight with the same headcount. This increased capacity is what makes diesel mechanic tool financing a strategic move; the equipment effectively pays for itself by unlocking revenue streams that were previously blocked by technical limitations.
Qualifying for Financing: Requirements for Technicians and Shops
Securing diesel mechanic tool financing requires a methodical approach similar to troubleshooting a complex hydraulic system. Lenders in the industrial sector prioritize stability and the revenue-generating potential of the asset over simple consumer credit metrics. While traditional banks might look for a credit score above 700, many equipment-backed lenders offer approvals for scores as low as 600. This is because the diagnostic kit itself serves as collateral, reducing the lender's risk. You'll generally need to provide three to six months of bank statements and a professional equipment quote to begin the process.
The distinction between time-in-business and individual experience is a critical factor. Established shops with over two years of operation often qualify for the lowest interest rates, which typically range from 6% to 15% for strong borrowers in 2026. However, individual technicians with a documented work history can still access competitive financing through programs that recognize the high demand for skilled diagnostic labor. If your credit is less than perfect, providing a larger down payment or showing a consistent history of shop revenue can help bridge the gap and secure an approval.
Preparing Your Financing Application
Lenders prefer to finance complete, functional solutions rather than piecemeal components. When you request a quote for a Jaltest MHE or AGV kit, ensure it includes all necessary peripherals. Including a ruggedized diagnostic laptop in your financing package demonstrates to the lender that the equipment is ready for immediate field use. This "turnkey" approach makes the loan more attractive because it guarantees the tool can start generating billable hours the moment it arrives at your shop. A clear, itemized quote that includes the Jaltest Software Annual License shows professional foresight and a plan for long term sustainability.
Financing for New Shops and Independent Contractors
Starting a new LLC shouldn't prevent you from accessing dealer-level technology. Startup financing options exist specifically for newly formed businesses, though they may require a down payment of 10% to 20% to offset the lack of business credit history. In these cases, the diagnostic equipment acts as the primary security for the loan. Using the equipment as collateral allows you to preserve your personal lines of credit for other operational needs. To streamline your path to ownership, you can view the full range of diagnostic kits available for financing and select the package that fits your specific service niche.
Documentation is the final piece of the puzzle. Have your most recent tax returns and a summary of your shop’s average monthly throughput ready. When you can prove that a single DPF regeneration or a complex calibration will cover a significant portion of your monthly payment, lenders view your application as a calculated business move rather than a risky debt. This level of preparation ensures you get the best possible terms for your investment.
Mechnician’s Flexible Financing for Jaltest Diagnostic Kits
Mechnician approaches diagnostic technology with a focus on operational continuity rather than simple hardware sales. Instead of providing a generic loan for a single tool, our model for diesel mechanic tool financing encompasses the entire ecosystem required to perform dealer-level repairs. We understand that a diagnostic kit is only as effective as the software driving it and the cables connecting it to the machine. By financing the full package, including the Jaltest CV Kit, ruggedized diagnostic laptops, and specialized diagnostic cables, shops can avoid the frustration of missing components during a critical repair.
A significant advantage of this structured approach is the ability to bundle Jaltest training and technical support directly into the monthly payment. Diagnostic speed depends on the technician's proficiency with the interface. Including Jaltest University training ensures your team can utilize the full depth of the software from day one. Additionally, our financing plans can cover the initial Jaltest Software Annual License, ensuring that you have access to the three yearly updates that keep your equipment compatible with the latest vehicle models and emissions standards.
Tailored Solutions for Every Industry
Every shop has a unique service niche that dictates its equipment needs. Mechnician provides customized financing paths for specialized kits, including the Jaltest OHW (Off-Highway) Kit for construction and the Jaltest AGV Kit for agricultural machinery. Specialists in material handling can finance the Jaltest MHE Kit, while those working in the shipping sector can acquire the Jaltest Marine Kit. This flexibility allows you to build a diagnostic suite that matches your specific fleet requirements. You don't have to pay for passenger car coverage you don't use; instead, you invest in the precise modules that generate revenue in your bays.
The Mechnician Advantage: Support Beyond the Sale
The value of a diagnostic tool is maintained through consistent uptime and expert assistance. Our investment packages often include access to Jaltest technical support, providing a safety net for complex troubleshooting scenarios. This remote support functions as an external professional unit, helping your technicians navigate difficult wiring diagrams or system calibrations. Planning for the future is also a core part of our philosophy. We help shops manage the long term costs of technology by offering clear paths for financing future software renewals, ensuring your shop never faces a "digital lockout" due to an expired license.
Choosing the right partner for your equipment needs is a decision that impacts your shop's stability for years to come. Contact Mechnician to discuss your custom financing plan today. Our team will help you identify the hardware, software, and training bundle that best serves your operational goals while maintaining a manageable monthly overhead.
Securing Your Shop’s Competitive Edge
The shift toward digital diagnostics is a permanent evolution in the heavy-duty repair sector. Transitioning from high-interest revolving credit to structured diesel mechanic tool financing allows you to treat diagnostic equipment as a primary revenue driver rather than a financial burden. By securing dealer-level capabilities in-house, your shop eliminates the high cost of third-party outsourcing and significantly improves bay throughput. This strategic approach ensures that your technical infrastructure remains a stable foundation for growth.
Success in this complex landscape requires more than just hardware. It demands a partnership that provides the training and technical depth necessary to handle modern vehicle complexity. As an Authorized Jaltest Dealer, Mechnician offers a complete ecosystem including expert remote technical support and comprehensive training via Jaltest University. These resources ensure your investment remains productive and your team stays ahead of proprietary software barriers. Your shop’s growth depends on the stability and precision of your tools.
Take the next step toward reclaiming your billable hours and expanding your service range. View Jaltest Diagnostic Bundles and Financing Options to find a solution tailored to your operational needs. Secure your shop’s future with the professional support your expertise deserves.
Frequently Asked Questions
Can I finance a used diagnostic kit or just new equipment?
Commercial lenders primarily focus on new equipment because it includes a manufacturer warranty and a predictable service life. Financing used diagnostic hardware is often more complex because the software licenses may not be easily transferable or the hardware may be near obsolescence. Investing in new equipment through diesel mechanic tool financing ensures you have the latest processor speeds and interface standards required for modern ECUs.
How does financing a Jaltest kit differ from a tool truck account?
Commercial financing provides a fixed-term loan with a set end date and lower interest rates than revolving tool truck credit. While mobile distributor credit can carry interest rates as high as 28.9%, professional commercial loans for established shops in 2026 typically range from 6% to 15%. This structure allows for better long-term financial planning and protects your personal credit score by keeping the debt on a business profile.
Is the annual software license renewal fee eligible for financing?
You can bundle the initial Jaltest Software Annual License into your primary financing agreement. This allows you to spread the cost of the software across your monthly payments rather than paying a large sum upfront. For subsequent years, many shops use a small equipment line of credit to manage renewals, ensuring their diagnostic tools never face a "digital lockout" due to an expired license.
What is the typical interest rate for diesel mechanic tool financing in 2026?
Interest rates for strong borrowers in 2026 generally sit between 6% and 15% through traditional banks and specialized industrial lenders. These rates are significantly more favorable than the 16.04% representative APR often found in hire purchase programs from tool manufacturers. Your specific rate will depend on your shop's time-in-business, your credit history, and the total value of the diagnostic ecosystem you are acquiring.
Do I need a business license to qualify for commercial tool financing?
Most lenders require a valid business license or proof of a legal entity, such as an LLC, to approve a commercial loan. This documentation proves that the equipment is a professional asset intended for revenue generation. Independent contractors who don't own a shop can often qualify by providing tax returns that demonstrate a consistent history of self-employment in the heavy-duty repair industry.
Can I bundle training and technical support into my monthly tool payment?
You can include Jaltest training and remote technical support packages in your total financed amount. Lenders often prefer these bundled "turnkey" solutions because they guarantee the technician has the expertise to generate revenue with the tool immediately. Including these services ensures that your shop has the necessary professional backing to resolve complex diagnostic faults without additional out-of-pocket costs.
What happens if I want to upgrade my diagnostic laptop before the loan is paid off?
Many commercial equipment agreements allow for "mid-term" upgrades through a lease addendum or a loan restructure. This flexibility allows you to trade in your current hardware for a more powerful ruggedized diagnostic laptop while rolling the remaining balance into a new agreement. This ensures your hardware performance always matches the requirements of the latest software updates and vehicle communication protocols.
Are there tax benefits to leasing my diagnostic equipment instead of buying it?
Leasing provides substantial tax advantages, particularly through the Section 179 deduction. In 2026, qualifying businesses can expense up to $1,160,000 of equipment in the year of purchase, which applies to many lease-to-own structures. This allows you to deduct the full cost of your Jaltest CV or OHW kit from your gross income, significantly reducing the effective cost of your investment while preserving your working capital.
What if your maintenance team could resolve complex fault codes without waiting days for a dealer technician to arrive on-site? With over 50% of heavy-duty repair shops currently facing understaffing, the pressure to maintain uptime has never been higher. It's frustrating to watch skilled mechanics become "parts changers" simply because they lack the specific knowledge to interpret modern Tier 4 Final or Stage V emission systems. Investing in heavy equipment diagnostic training isn't just an elective choice for fleet managers. It's a strategic requirement for operational stability.
We understand that the increasing density of sensors and ECUs can feel overwhelming. This master guide for 2026 will show you how to bridge the technical skills gap, master intricate system diagnostics, and significantly reduce your reliance on outside dealers. We'll walk through the latest industry developments, including the July 2026 EPA "Right to Repair" guidance and the advanced capabilities of Jaltest version 26.1. Our goal is to help your shop operate with the precision and confidence that modern machinery demands.
Key Takeaways
Understand why modern heavy equipment requires a shift from reactive parts replacement to proactive, system-level analysis.
Learn why fundamental knowledge of electrical flow and hydraulic pressure is critical before connecting any software.
Discover how professional heavy equipment diagnostic training through Jaltest University enables your team to manage hundreds of brands with one interface.
Identify the hardware and culture shifts, including the use of ruggedized laptops, needed to maintain a high-functioning shop floor.
Explore how technical support and authorized partnerships help your technicians solve complex faults without dealer intervention.
Why Heavy Equipment Diagnostic Training is Essential in 2026
The heavy equipment industry has reached a tipping point where mechanical intuition alone is no longer sufficient. In 2026, machines are defined by multiplexed control modules and Advanced Driver Assistance Systems (ADAS) that require a higher level of technical literacy. Comprehensive heavy equipment diagnostic training serves as the bridge between traditional mechanical repair and modern system engineering. It represents a fundamental shift from reactive parts replacement to proactive, data-driven system analysis.
Relying on a "trial and error" approach creates a cascade of financial losses. When a technician replaces a high-pressure fuel pump only to find the fault remains, the business loses the cost of the part, the labor hours, and the potential revenue from the machine's downtime. Professional training transforms these "parts changers" into diagnostic experts who can pinpoint root causes with surgical precision. This shift is critical for maintaining fleet operational stability, especially since reports from 2025 and 2026 indicate that over 50% of repair shops are struggling with a persistent technician shortage.
Precision calibration is also a matter of compliance. With the California Air Resources Board (CARB) developing Tier 5 emissions standards as of February 2026, the margin for error in exhaust aftertreatment systems has narrowed. Accurate heavy equipment diagnostic training ensures that your team can maintain machines to these stringent requirements, preventing heavy fines and environmental non-compliance while ensuring the safety of the operator through properly calibrated ADAS sensors.
The Shift from Parts Changer to Diagnostic Expert
Throwing parts at a fault code is the most expensive way to manage a fleet. It hides the underlying issue, such as a frayed wire or a failing sensor, which will inevitably cause the new part to fail again. Developing an engineering mindset involves using technical data to understand the "why" behind a failure. Industry professionals report that utilizing integrated technical data can reduce troubleshooting time by up to 50%, allowing machines to return to the field faster and with greater reliability.
Dealer Lockouts and the Right to Repair
Independent shops often feel sidelined by proprietary software lockouts. However, the regulatory landscape changed significantly on July 1, 2026, when the EPA issued new guidance affirming that manufacturers must provide independent shops with the same diagnostic information available to branded centers. By mastering all-makes diagnostic tools, your team can reclaim revenue that was previously lost to dealer service departments. To understand how these tools fit into current requirements, refer to our Professional Vehicle Diagnostic Tool Guide for more details on industry standards.
Mastering the Core Fundamentals: Electrical and Hydraulic Systems
High-end software is a powerful asset, but it remains ineffective if the technician doesn't understand the physical medium it monitors. Professional heavy equipment diagnostic training must prioritize the physics of the machine before the logic of the code. A fault code for "low fuel pressure" might lead a technician to replace a sensor, but a manual pressure gauge might reveal a clogged primary filter or a failing lift pump. Without these fundamentals, the software is merely a digital suggestion box rather than a precision instrument.
The technician’s toolkit must move beyond the code reader. While a laptop provides the data, multimeters and pressure gauges identify the physical reality. Interpreting complex wiring harnesses and hydraulic circuits requires more than just looking at a screen; it requires the ability to read and understand schematics. In the heavy-duty sector, most electrical failures aren't caused by computer glitches. They're caused by physical stressors:
Corrosion: Salt and moisture infiltrating connectors and eating away at copper conductors.
Vibration: Constant movement causing wires to rub through insulation against the chassis or brackets.
Grounding Issues: Poor connections at the frame that create high resistance and erratic sensor readings.
Developing a diagnostic mindset means using these tools to verify what the software reports. If the software shows five volts at a sensor but the multimeter shows three, you've identified a wiring issue, not a component failure. This level of precision saves hours of unnecessary labor. To ensure your shop is equipped with tools that match this level of expertise, consider exploring the professional diagnostic kits and support available for modern fleets.
Electrical Theory for Heavy-Duty Technicians
Ohm’s Law is the foundation for troubleshooting sensors and actuators. Technicians need to be able to calculate expected values to identify open circuits, short circuits, or high resistance. When dealing with J1939 data links, a multimeter is essential for performing voltage drops and continuity tests. This ensures the communication highway is functional before an expensive ECU is condemned. Accuracy here prevents the costly mistake of replacing healthy modules.
Hydraulic Diagnostics and System Integration
Modern hydraulics rely on the seamless integration of electronic control valves and mechanical outputs. Diagnosing a solenoid failure often involves software-driven activation tests, but the technician must verify the actual hydraulic response at the cylinder or motor. Safety protocols are critical during these routines. High-pressure systems can be lethal if handled incorrectly. Training must emphasize pressure relief procedures and the correct use of test ports to ensure the diagnostic process remains safe and controlled.
Jaltest University: A Comprehensive Software Training Ecosystem
Modern diagnostics requires more than just a tool; it requires a structured learning environment that evolves alongside the machinery. Jaltest University represents this shift by providing a dynamic training ecosystem rather than a static set of instructions. With the release of version 26.1 in March 2026, the platform has integrated advanced web-based workshop management and expanded vehicle coverage. This ensures that heavy equipment diagnostic training stays relevant as manufacturers release new ECU configurations and complex subsystems. By consolidating diagnostic capabilities into a single interface, technicians can apply a consistent methodology across diverse brands like Caterpillar, Komatsu, or John Deere, reducing the cognitive load on your team.
The versatility of an all-makes platform is essential for shops managing mixed fleets. Instead of learning ten different proprietary programs, your staff masters one environment. This mastery extends to advanced calibrations that were once the sole domain of dealers. Training modules cover critical procedures such as DPF regenerations, injector coding, and Variable Geometry Turbocharger (VGT) actuations. These are high-stakes tasks where precision is non-negotiable. Staying current with these capabilities requires a Jaltest Software Annual License, which provides the regular updates needed to interface with the latest manufacturer releases and emissions protocols.
Specialized Training for Off-Highway and Agricultural Equipment
The Jaltest OHW (Off-Highway) Kit requires specific procedural knowledge to navigate the unique architectures of construction machinery. Technicians learn how to perform hydraulic calibrations and engine health checks on excavators, loaders, and graders. Similarly, mastering the Jaltest AGV (Agricultural Equipment) Kit involves understanding the seasonal demands of tractors and combines. Precision here ensures that a machine is ready for the field when it matters most. For those also managing transport fleets, our Jaltest CV Kit Guide provides a detailed look at all-makes truck diagnostics in the current market.
The Role of Technical Data and Wiring Diagrams
Software is most effective when it provides a clear path to resolution. The Jaltest interface includes integrated troubleshooting guides that lead the technician through a step-by-step repair path based on specific fault codes. This includes component locations and technical specifications that eliminate guesswork. In warehouse environments, maximizing the value of the Jaltest MHE (Material Handling Equipment) Kit means being able to quickly identify electrical faults in forklifts or telehandlers. Access to interactive wiring diagrams allows your team to trace circuits with confidence, ensuring that every repair is grounded in verified technical data.
Building a Diagnostic-First Culture in Your Maintenance Team
Transforming a shop's performance requires more than just a software purchase. It demands a cultural shift where diagnostics are prioritized over parts replacement. This process starts with a systematic assessment of your current staff to identify specific knowledge gaps. Some technicians might have decades of mechanical experience but struggle with multiplexed circuits. Others may be comfortable with computers but lack a deep understanding of hydraulic pressures. Once you've mapped these skills, heavy equipment diagnostic training becomes a targeted roadmap for growth rather than a generic classroom exercise.
Implementing a "diagnostic-first" approach means creating a low-stakes environment for learning. Fleet managers should schedule dedicated training hours where technicians can explore software features on machines that aren't currently facing an emergency deadline. This practice allows them to navigate technical data and wiring diagrams without the pressure of an active machine down situation. Incentivizing this progress is equally important. Rewarding technicians who complete Jaltest University modules or achieve specific certifications turns professional development into a valued career milestone. To support this transition, you can explore our range of ruggedized diagnostic laptops and technical training solutions designed for professional environments.
Remote Technical Support as Continuous Education
Technical support shouldn't be viewed as a one-time rescue for a difficult fault. Instead, it functions as a live classroom experience. When your team uses Jaltest technical support to resolve complex "ghost codes" or intermittent faults, they're participating in a guided repair path. This interaction builds long-term competence and breaks the cycle of dealer reliance. Over time, these guided sessions empower your technicians to handle similar issues independently, turning every challenging repair into a teaching tool for the entire shop.
Selecting the Right Hardware for Training
The shop floor is a hostile environment for standard consumer electronics. Extreme temperatures, dust, and physical impacts will quickly disable a standard laptop, halting your heavy equipment diagnostic training efforts. Ruggedized diagnostic laptops are engineered to survive these conditions. They ensure that your team has reliable access to the Jaltest software annual license updates and technical specifications whenever a machine enters the bay. Investing in hardware that matches the durability of your heavy equipment is a strategic decision that prevents unnecessary downtime and hardware replacement costs.
The Mechnician Advantage: Beyond the Training Course
Completing a certification is only the first step toward diagnostic independence. True operational stability comes from a long term partnership with experts who understand the realities of the shop floor. Mechnician serves as your authorized partner for Jaltest solutions; providing the technical upskilling and hardware support necessary to maintain a modern fleet. We don't just deliver a kit and leave; we provide a national network of specialists capable of offering remote guidance and on-site assistance when your team encounters a particularly stubborn fault. This commitment to your fleet's uptime ensures that your investment in heavy equipment diagnostic training yields a measurable return in reduced dealer fees and shorter repair cycles.
Financial accessibility is a key part of our solution. We offer flexible financing options for diagnostic kits and training enrollment fees, allowing maintenance departments to modernize their toolsets without immediate capital strain. This professional approach treats technical education as a strategic asset for future stability rather than a one-time expense. By aligning your team with Mechnician and Cojali, you're integrating a dedicated technical unit into your organization that takes responsibility for the continuous functionality of your diagnostic capabilities.
Total Lifecycle Support for Your Diagnostic Tools
Maintaining the edge in diagnostics requires keeping your tools as current as the machinery they service. This involves managing Jaltest Software Annual License renewals to ensure compatibility with the latest ECU releases and emissions standards. Our support extends to providing Specialized Diagnostic Cables for niche or legacy equipment, ensuring you never lose coverage on older assets. Our technical support team is always available to help your technicians maximize tool utilization, helping them navigate new software features as they are released.
Next Steps: Reclaiming Control of Your Repairs
Reclaiming control over your maintenance schedule starts with a customized training plan tailored to your department's specific needs. Whether you're managing a small construction fleet or a large agricultural operation, the combination of Jaltest versatility and Mechnician expertise provides a clear path to self-sufficiency. The long term benefits of this partnership include a more confident workforce and a significant reduction in machine downtime. You can contact Mechnician to discuss your heavy equipment diagnostic training needs and begin the transition toward a more efficient, diagnostic-first maintenance culture.
Securing Your Fleet's Operational Future
The heavy equipment landscape in 2026 requires a precise blend of mechanical intuition and digital literacy. By integrating fundamental system theory with advanced software capabilities, your team can finally break the cycle of expensive dealer reliance. We've explored how a diagnostic-first culture, supported by ruggedized hardware and specialized training, transforms your shop into a high-efficiency unit. This transition ensures that your equipment stays in the field rather than waiting in a service bay for weeks at a time.
Professional heavy equipment diagnostic training is a necessary investment in your fleet's long-term stability. As an Authorized Jaltest Dealer, Mechnician provides the tools and knowledge your technicians need to succeed. You'll gain direct access to Jaltest University and our expert remote technical support to ensure your team solves even the most complex faults with confidence. This partnership provides the technical backbone your organization needs to thrive in an increasingly complex industry.
How long does it take to become proficient in heavy equipment diagnostics?
Proficiency in heavy equipment diagnostics typically takes between six and twelve months of consistent hands-on experience and structured study. While basic fault code reading can be learned quickly, mastering complex system analysis and bi-directional testing requires ongoing engagement with modern software. Technicians who commit to regular modules often see a significant improvement in their troubleshooting speed within the first year.
Can I learn to use Jaltest software online, or is in-person training required?
You can learn to use Jaltest software through online modules provided by Jaltest University, which offers a flexible way to master the interface. These web-based courses allow technicians to progress at their own pace from any location. While in-person workshops can provide valuable tactile experience, the digital platform is designed to be a comprehensive standalone resource for software literacy.
What is the difference between a code reader and a professional diagnostic kit?
A professional diagnostic kit offers bi-directional control and deep system access that a simple code reader cannot match. While a code reader only identifies a fault, a professional kit allows you to perform DPF regenerations, calibrate actuators, and access integrated wiring diagrams. This level of heavy equipment diagnostic training ensures your team can actually repair the machine rather than just identifying the symptom.
What happens if my technicians encounter a fault they cannot solve after training?
Technicians who encounter an unsolvable fault can utilize expert remote technical support to guide them through the repair path. This real-time assistance acts as a safety net, ensuring that complex "ghost codes" or intermittent failures don't result in machine downtime. This service functions as an extension of your team, providing the confidence needed to tackle advanced electronic issues.
Is Jaltest University included with the purchase of a diagnostic kit?
Access to Jaltest University is typically included with the purchase of a diagnostic kit and the maintenance of an active software license. This ensures that your team has the educational resources needed to utilize the tool's full potential from day one. It serves as a centralized hub for learning the specific nuances of OHW, AGV, and CV modules.
Do I need a separate training course for different brands like Caterpillar or John Deere?
No, you don't need separate training courses for different brands because Jaltest utilizes a unified interface for hundreds of manufacturers. Once a technician learns the software logic, they can apply the same diagnostic process to Caterpillar, John Deere, or Komatsu machinery. This all-makes versatility is a primary advantage of professional heavy equipment diagnostic training, as it simplifies the learning curve for mixed fleets.
How much does heavy equipment diagnostic training typically cost for a team?
The cost of diagnostic training varies based on the depth of the program and the number of technicians involved. Industry-standard workshops for specific systems like hydraulics or electrical troubleshooting often range from $450 to $475 per person at technical universities. For a full maintenance department, a customized plan involving software-integrated modules is often the most cost-effective way to achieve team-wide proficiency.
Can training help reduce my fleet’s annual maintenance budget?
Training helps reduce your fleet’s annual maintenance budget by significantly lowering the frequency of dealer service calls and reducing machine downtime. When technicians can identify root causes accurately, you avoid the "parts changer" mentality that leads to unnecessary component costs. Over time, the ability to perform in-house calibrations and regenerations provides a measurable return on investment.
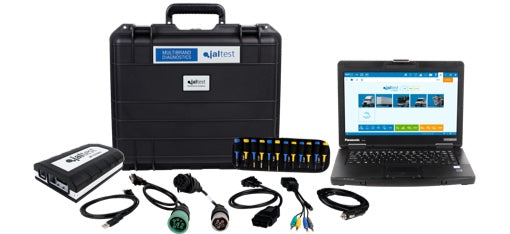
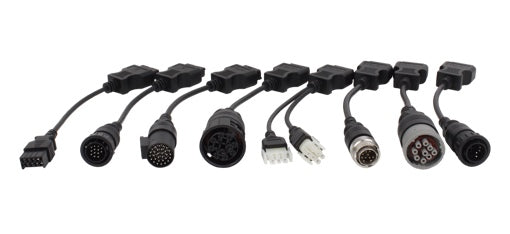

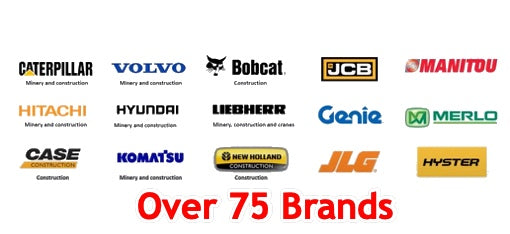
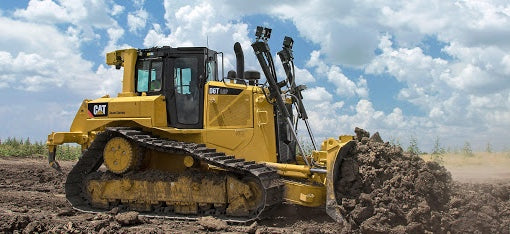
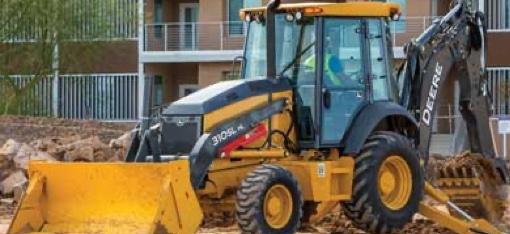

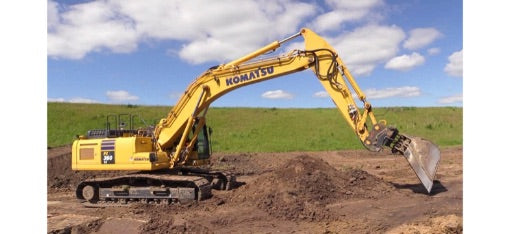
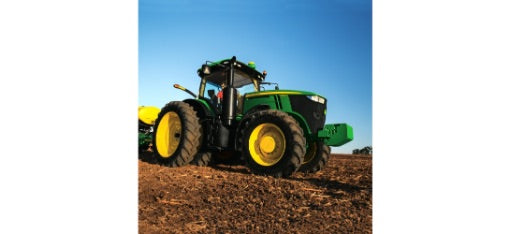
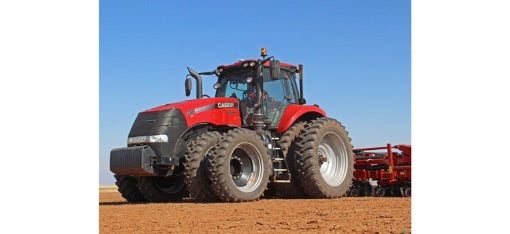
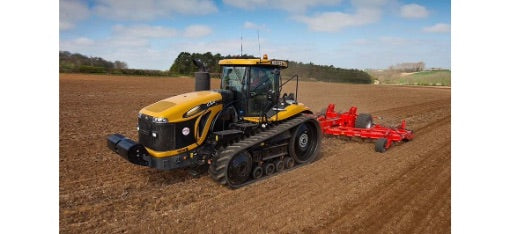
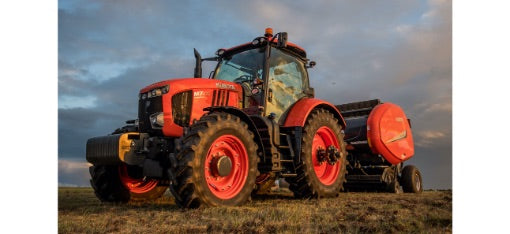


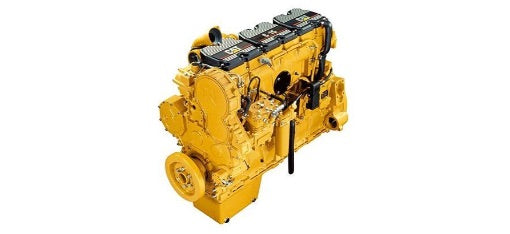


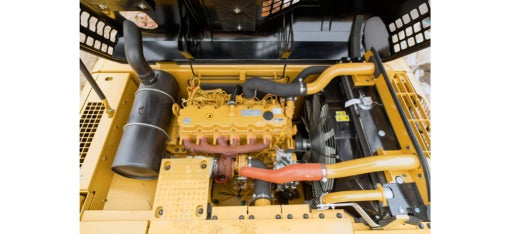


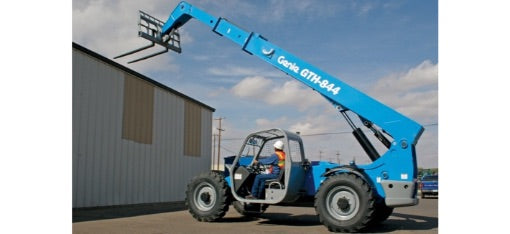


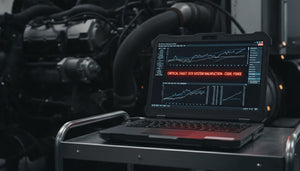
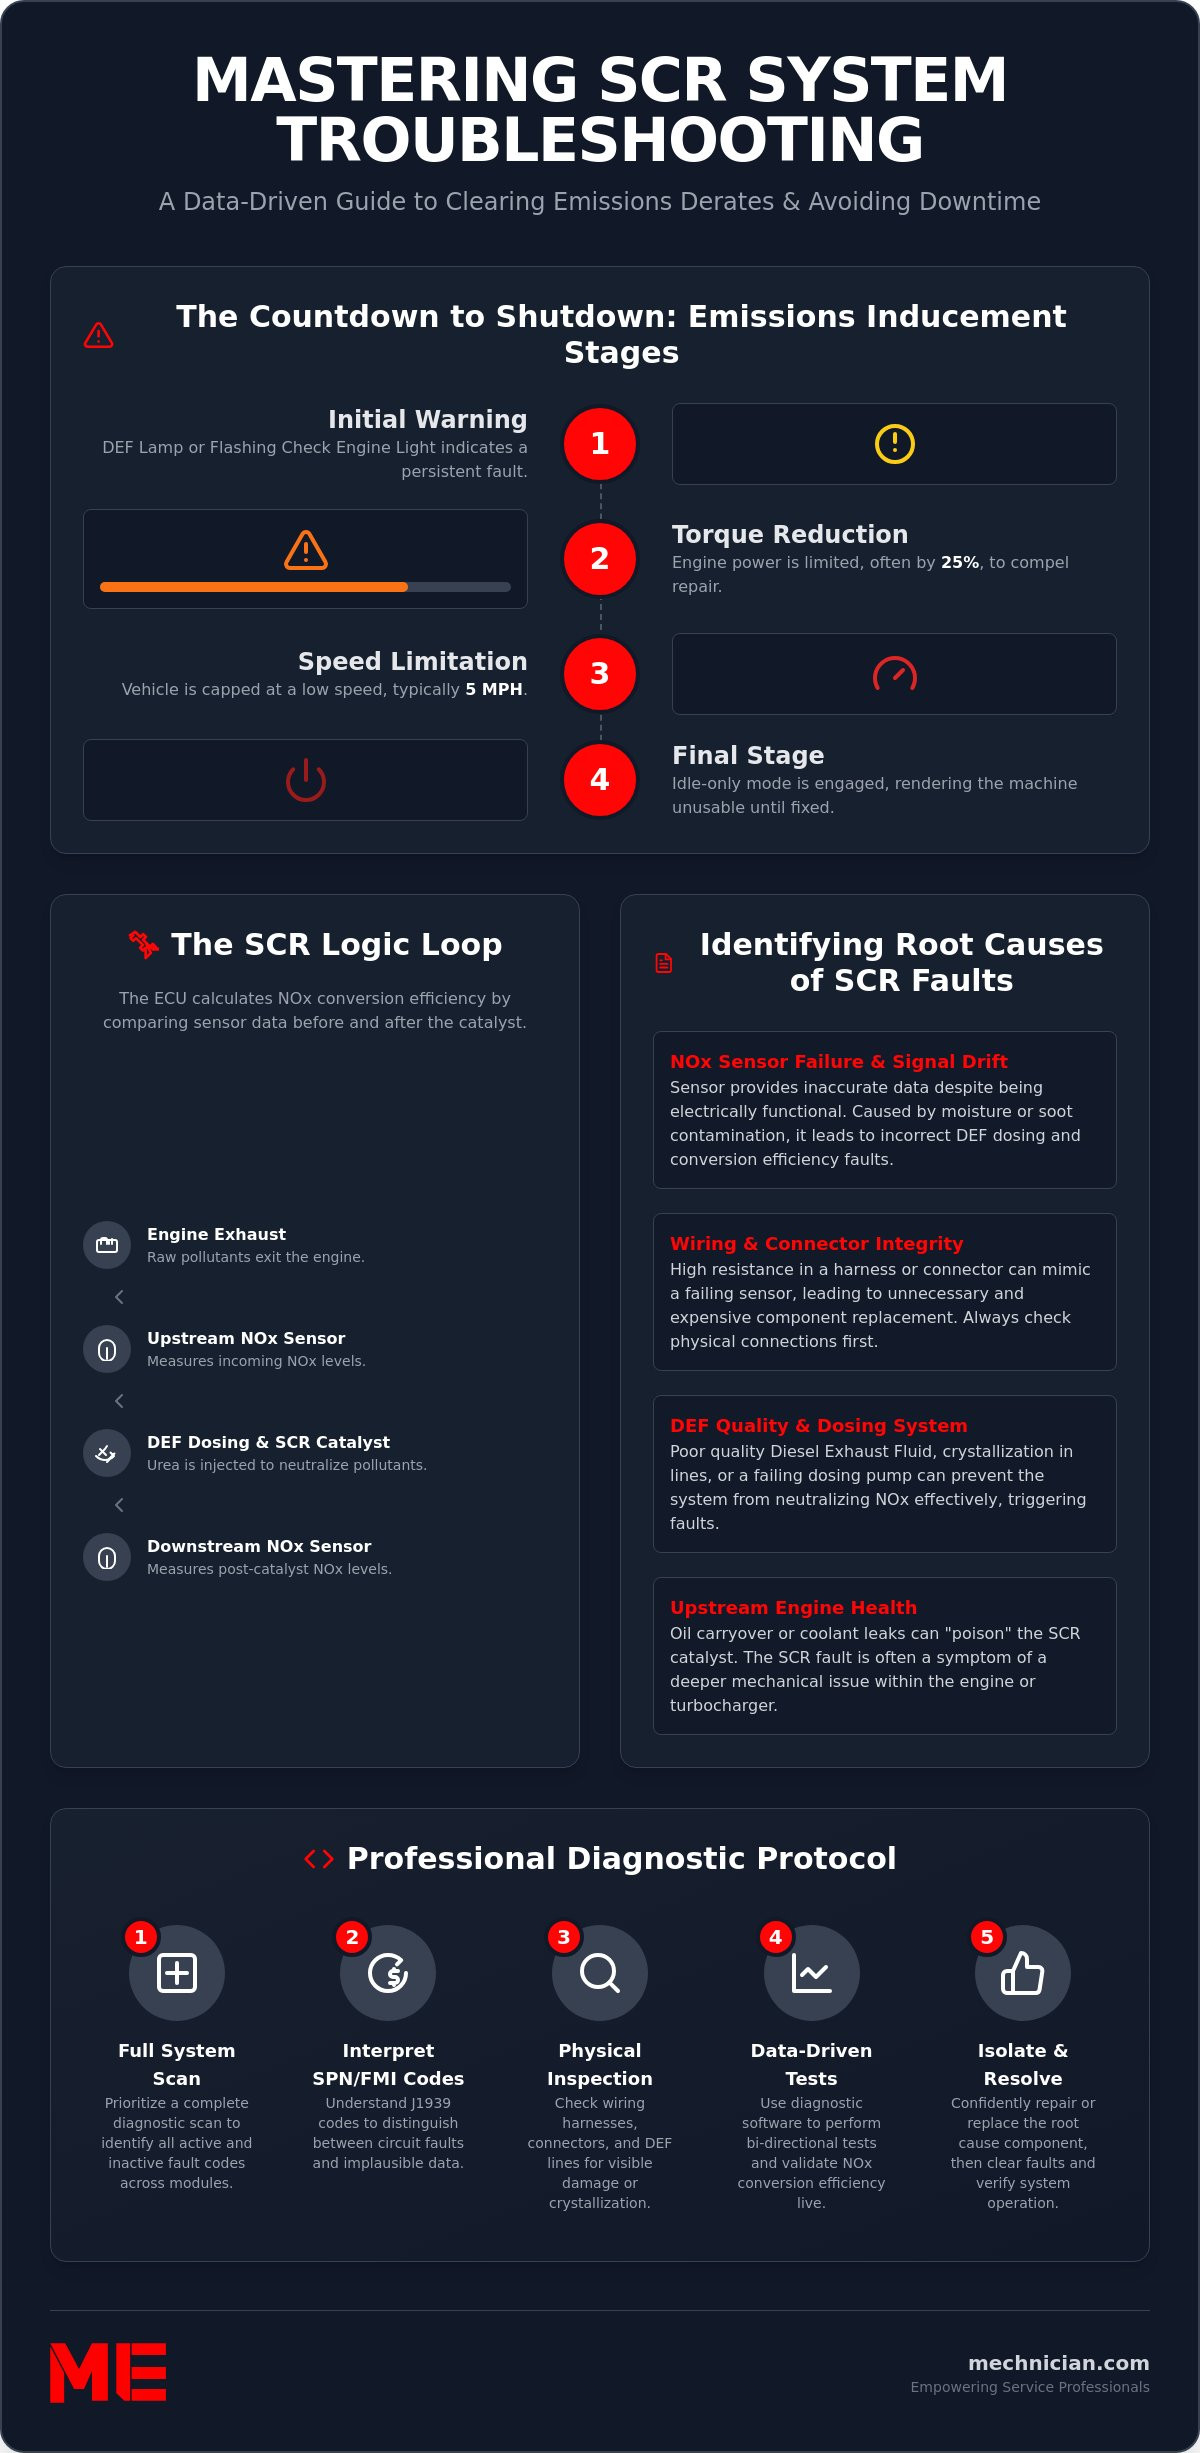

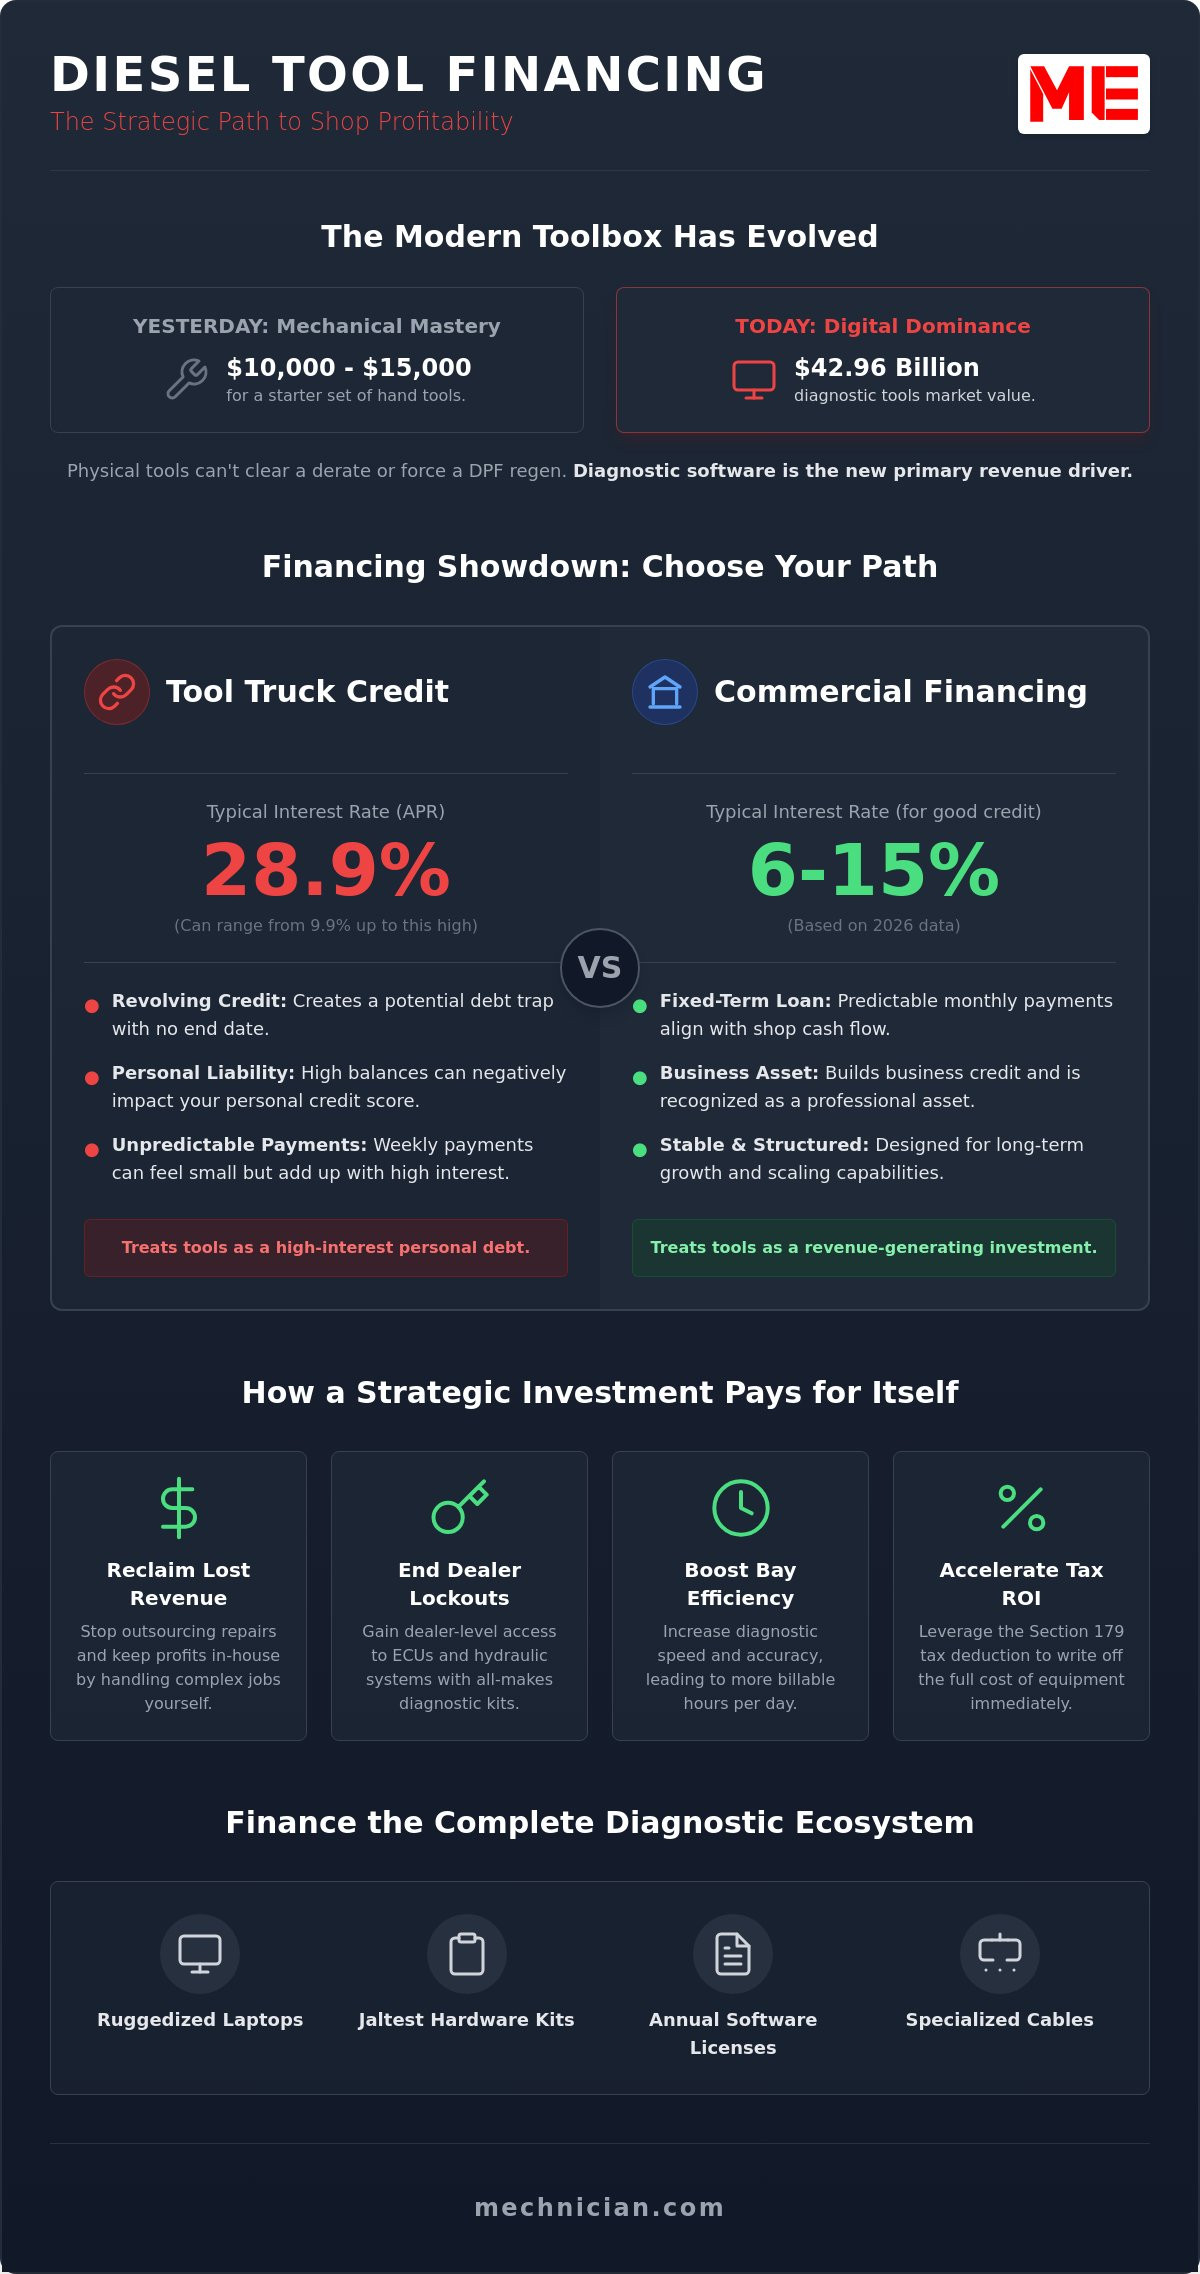
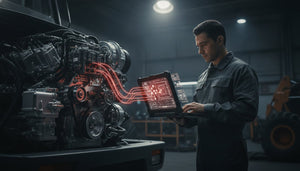
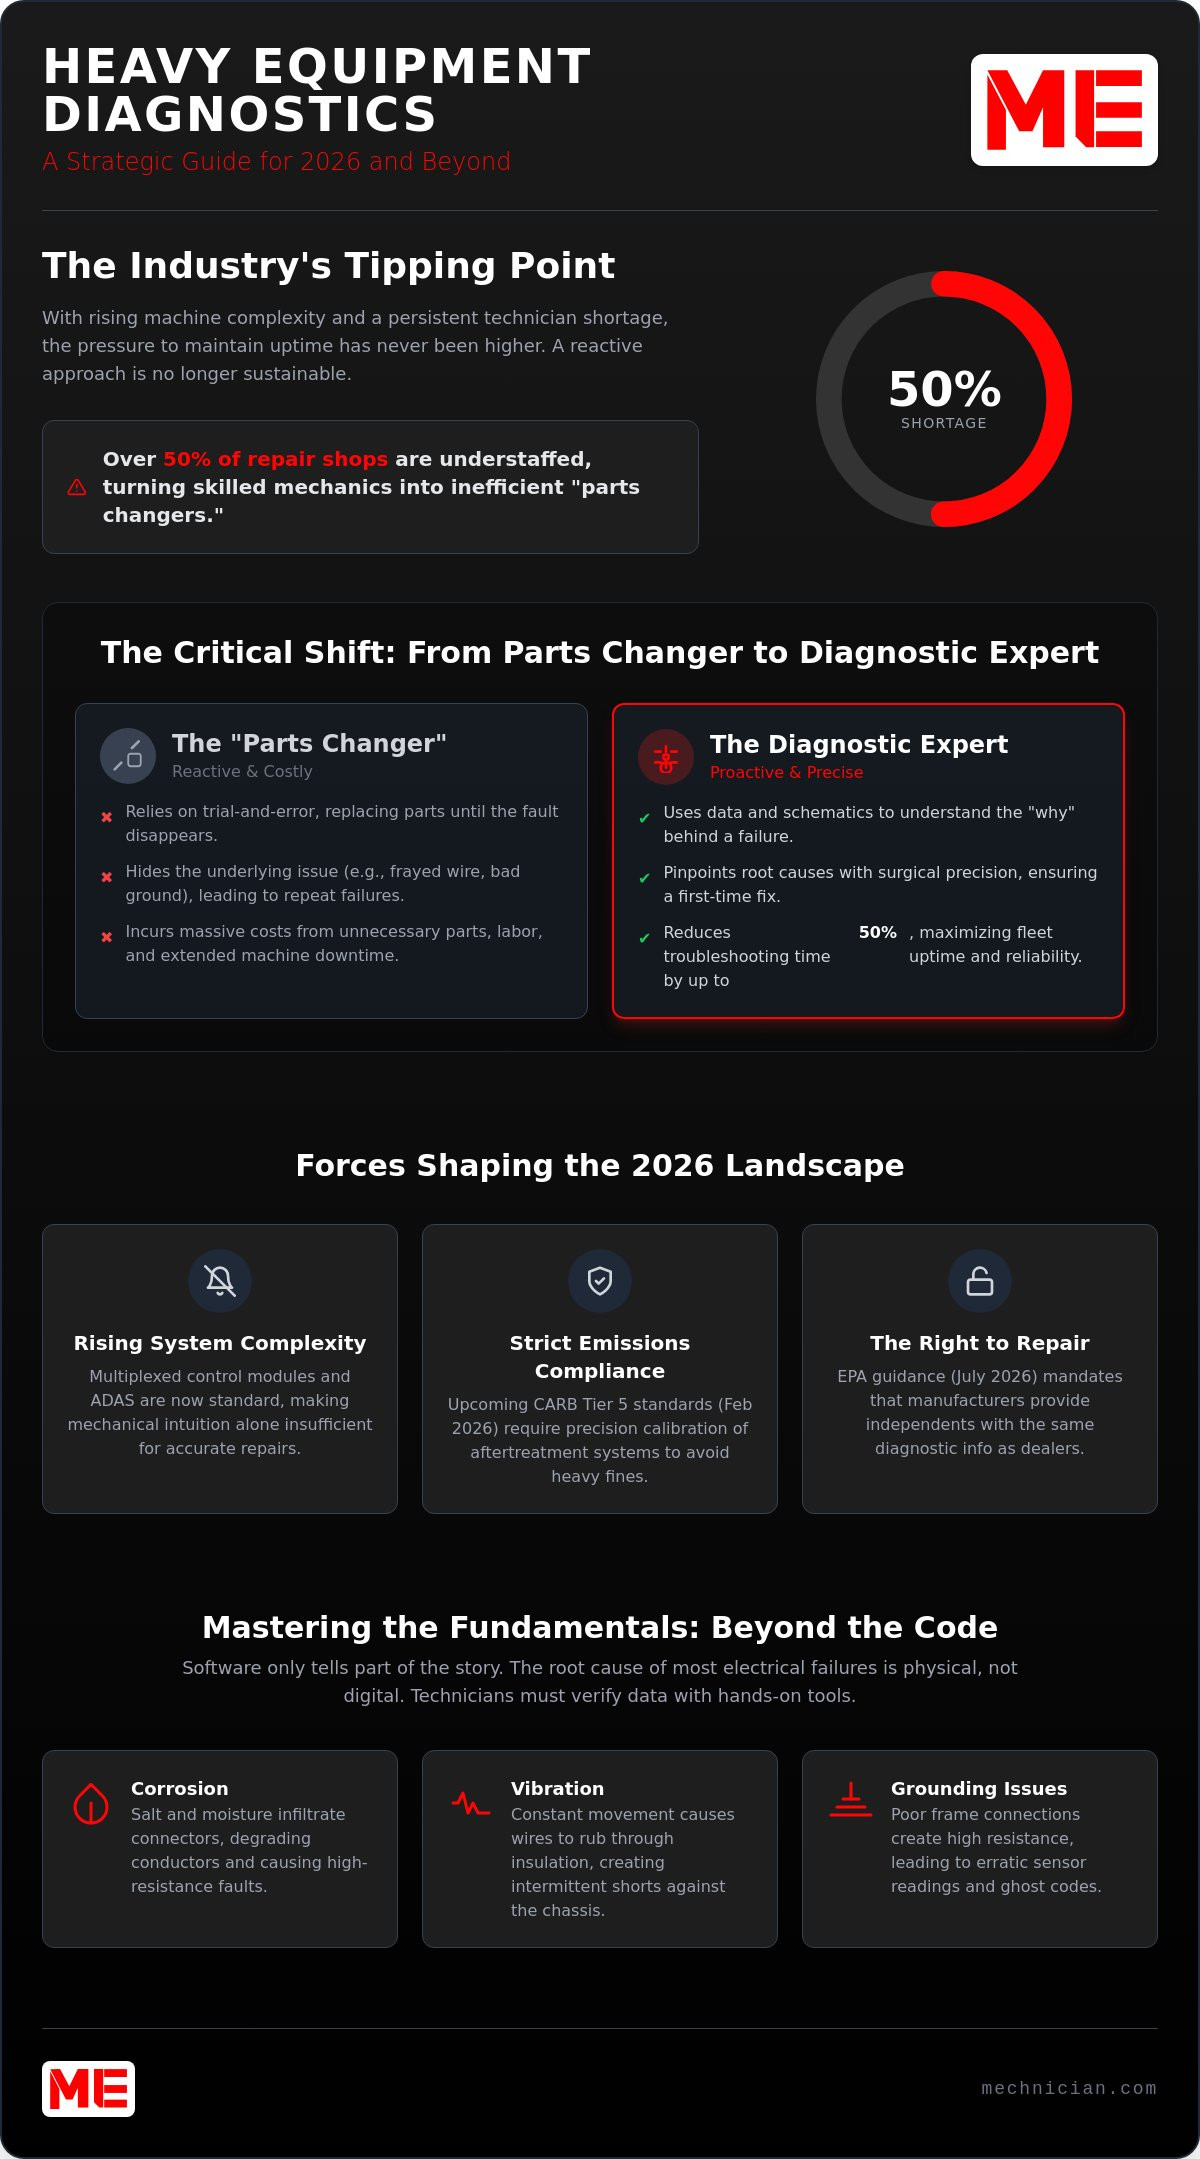
Laissez un commentaire